

Safe DIY Gel Nail Removal at Home
Compartilhe agora mesmo:
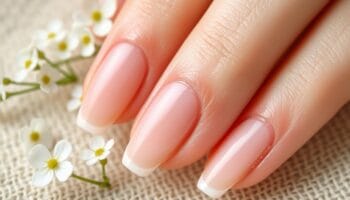
Gel nails have taken the beauty world by storm, becoming a trend that shows no signs of slowing down. But sometimes, you might want to switch things up or just give your nails a breather. In this article, we’re going to spill the beans on how to safely remove gel nails at home. Follow our step-by-step guide and enjoy healthy, beautiful nails.
Key Takeaways
- Gel nails are popular but sometimes need removal for nail health.
- Proper tools and techniques are essential for safe removal.
- Acetone is key, but it must be used correctly to avoid damage.
- Post-removal care is crucial for maintaining nail health.
- Consider alternatives like acrylics or natural nail care.
Understanding Gel Nails and Their Popularity
What Are Gel Nails?
Gel nails are a type of artificial nails that are designed to resemble natural nails. They are created using a gel substance that is applied to the nail and cured under a UV or LED light. This process hardens the gel, creating a glossy and durable finish. Gel nails can be used to extend the length of the nails or to add strength to the natural nail.
Why Are Gel Nails So Popular?
Gel nails have gained immense popularity because of their long-lasting and chip-resistant nature. Unlike traditional nail polish, gel nails maintain their shine and color for weeks without losing their luster. They are perfect for individuals who want a long-lasting, glossy finish that doesn’t require frequent touch-ups. Additionally, gel nails are versatile and can be customized with various colors and designs, making them a favorite among nail art enthusiasts.
Benefits of Gel Nails
- Durability: Gel nails are known for their strength and ability to withstand daily wear and tear.
- Aesthetic Appeal: They offer a natural look with a high-gloss finish that remains intact for weeks.
- Versatility: Gel nails can be easily shaped and decorated with a wide range of colors and patterns.
Common Misconceptions About Gel Nails
Many people believe that gel nails are damaging to natural nails. However, when applied and removed correctly, they do not cause harm. Another misconception is that gel nails are only for long nails. In reality, they can be applied to short nails as well, providing a neat and polished appearance. It’s also thought that gel nails are overly expensive, but with at-home kits, achieving a salon-quality look is more accessible than ever.
Gel nails offer a perfect blend of style and practicality, making them a top choice for anyone looking to maintain beautiful nails with minimal effort.
Essential Tools for Safe Gel Nail Removal at Home
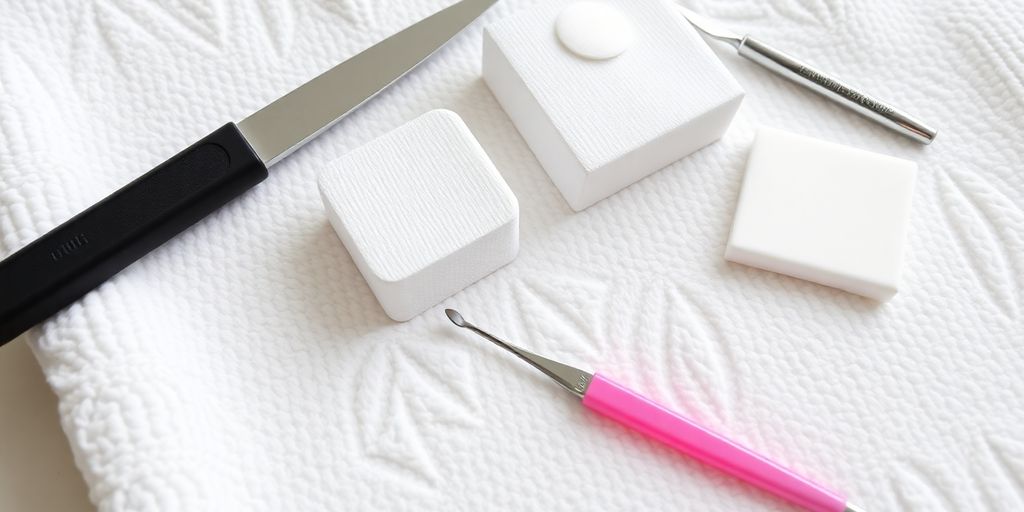
Gathering Your Supplies
Before you start removing gel nails, make sure you have all the necessary tools ready. Here’s what you’ll need:
- Pure Acetone: This is the key ingredient for breaking down the gel.
- Cotton Balls: For soaking and applying the acetone.
- Aluminum Foil: To wrap around your nails and hold the acetone-soaked cotton in place.
- Orange Stick: Useful for gently pushing off the softened gel.
- Nail File and Buffer: For smoothing out and shaping your nails after gel removal.
- Hand Cream: To moisturize your hands after the acetone treatment.
Choosing the Right Acetone
Not all acetones are created equal. Opt for pure acetone, as it’s the most effective in breaking down gel polish. Avoid acetone-free removers, as they won’t work on gel nails. You can find pure acetone at most drugstores or beauty supply shops.
Importance of Quality Tools
Investing in quality tools is crucial. Cheap files and buffers might do more harm than good, leaving your nails brittle and uneven. A good orange stick will help you remove gel without damaging your natural nails.
Safety Precautions to Consider
Working with acetone can be harsh on your skin and nails. Here are some tips to keep in mind:
- Ventilation: Ensure you’re in a well-ventilated area to avoid inhaling too much acetone.
- Skin Protection: Apply a layer of petroleum jelly around your nails to protect your skin from drying out.
- Gentle Handling: Be gentle when scraping off the gel to avoid damaging your natural nails.
Taking the time to gather the right tools and following safety precautions can make the process of removing gel nails at home much safer and more effective. Be patient and gentle with your nails to maintain their health and strength.
Step-by-Step Guide to Removing Gel Nails Safely
Preparing Your Nails
First things first, you gotta get your nails ready for the process. Start by trimming your gel nails down a bit. This just makes everything easier later on. Next, grab a 180-grit nail file and gently buff the top layer of your nails. You’re aiming to remove that shiny finish. This step is essential because it helps the acetone penetrate the gel more effectively.
Applying Acetone Correctly
Now, take some cotton balls and soak them in pure acetone. Place one on each nail, making sure it’s covering the entire surface. This might sound simple, but proper application is key to breaking down the gel.
Wrapping and Waiting
Here’s where patience comes in. Wrap each acetone-covered nail with a small piece of aluminum foil. This traps the heat and helps the acetone work its magic. Let your nails sit like this for about 15 to 20 minutes. It’s a good time to catch up on your favorite show or just relax.
Removing the Gel Gently
Once the waiting is over, carefully unwrap one nail at a time. Using a wooden cuticle stick, gently push off the softened gel. If it doesn’t come off easily, rewrap the nail and give it a few more minutes. You don’t want to force it and risk damaging your natural nails.
Pro Tip: If you feel any resistance, don’t pull or scrape too hard. It’s better to be gentle and patient than to end up with damaged nails.
After you’ve removed the gel, lightly buff your nails to smooth out any leftover bits. Finish up with a good hand cream to rehydrate your skin and nails. And there you have it—a safe, at-home gel nail removal process!
Post-Removal Nail Care Tips
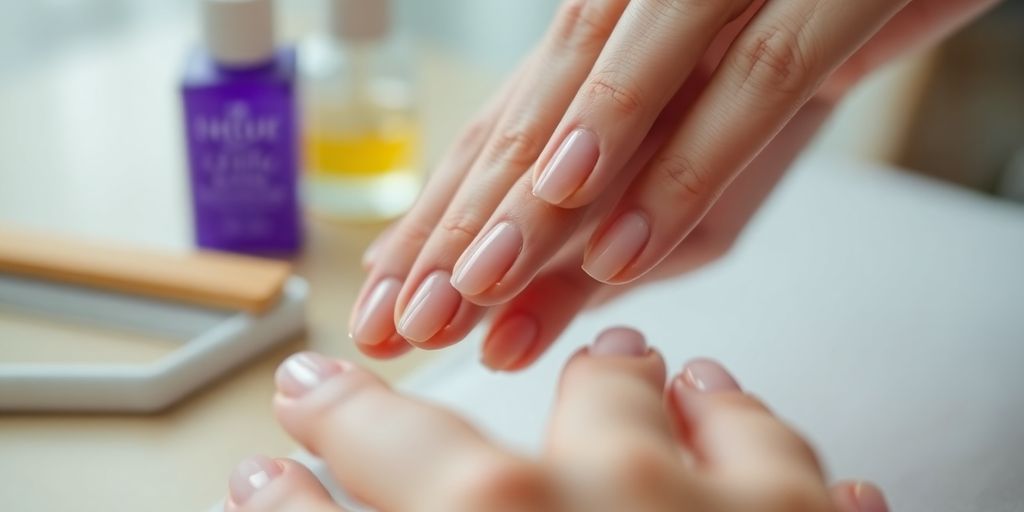
Hydrating Your Nails and Cuticles
After removing gel nails, your nails and cuticles might feel a bit dry. It’s time to pamper them with hydration. Use a nourishing cuticle oil or a hand cream to keep them moisturized. This step is crucial in preventing your cuticles from becoming cracked or rough. Regular hydration can also promote healthier nail growth over time.
Strengthening Weak Nails
Once the gel is off, your natural nails might feel a little weaker. Consider applying a strengthening base coat to help them recover. These products often contain vitamins and minerals that support nail health and can prevent further breakage. Make it a habit to apply this every few days to keep your nails strong and resilient.
Avoiding Common Mistakes
Don’t rush into getting another gel manicure immediately. Give your nails some time to breathe. Avoid using your nails as tools to open cans or peel off stickers, as this can cause them to chip or break. Also, steer clear of harsh chemicals that can weaken your nails further.
When to Seek Professional Help
If you notice any unusual pain or discoloration after removing your gel nails, it might be time to consult a professional. Persistent issues could indicate an underlying problem that needs attention. It’s always better to be safe and let an expert take a look if something doesn’t feel right.
Taking care of your nails after removing gel polish is just as important as the removal process itself. By following these care tips, you ensure your nails remain healthy and beautiful, ready for whatever style you choose next.
Exploring Alternatives to Gel Nails
Acrylic vs. Gel: Which is Better?
Choosing between acrylic and gel nails can be a bit tricky. Acrylic nails are renowned for their durability, making them a solid choice for those with an active lifestyle. They can withstand more wear and tear compared to gel nails. On the flip side, gel nails offer a more natural look and are generally easier to apply and remove. If you’re considering a switch, think about your daily activities and personal style preferences. Consulting with a nail technician can also help you make the best choice for your needs.
Natural Nail Care Options
If you’re looking to give your nails a breather from artificial enhancements, natural nail care might be the way to go. Start by keeping your nails trimmed and filed neatly. Regularly apply a nourishing nail oil to keep your cuticles healthy and nails strong. Consider using a nail hardener if your nails are prone to breaking. Embracing natural nails doesn’t mean sacrificing style; you can still have fabulous nails with a little extra care.
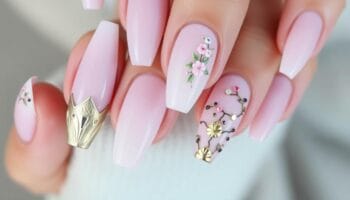
Trendy Nail Art Ideas
For those who love to express themselves through nail art, there are countless trendy ideas to explore. From minimalist designs to bold patterns, the options are endless. Try experimenting with different colors and textures. You can even incorporate elements like glitter or rhinestones for a touch of sparkle. Nail art is a fun way to showcase your personality and creativity.
Long-Lasting Nail Solutions
If longevity is your primary concern, there are several options to consider. Acrylic nails, as mentioned earlier, are quite durable. However, if you’re looking for something less traditional, you might explore bio-based polymer alternatives for gel nail polish. These eco-friendly options are gaining popularity for their sustainability while still offering long-lasting results. Whatever your choice, ensure you follow proper maintenance routines to extend the life of your manicure.
Sometimes, exploring new nail options can feel like a journey into the unknown. But with a little research and experimentation, you can find the perfect fit for your lifestyle and preferences.
Frequently Asked Questions About Gel Nail Removal
How Often Should You Remove Gel Nails?
Removing gel nails too frequently can weaken your natural nails. It’s generally recommended to remove them every two to three weeks, depending on how fast your nails grow. This ensures your nails have time to recover and breathe in between applications.
Can Gel Nails Damage Natural Nails?
Gel nails themselves don’t damage natural nails, but improper removal can. Peeling or scraping off the gel can strip away layers of your natural nail, leading to weakness and breakage. Always follow a safe removal process, like using acetone and foil wraps, to protect your nails.
What to Do If You Experience Pain
If you feel pain while your gel nails are on or during the removal process, it’s crucial to stop immediately. Pain can be a sign of damage or infection. Consider consulting a professional to assess the situation and provide guidance.
Tips for First-Time Gel Nail Removers
- Gather all necessary tools like acetone, cotton balls, and foil before starting.
- Be patient and allow enough time for the acetone to work—usually 15-20 minutes.
- Gently remove the gel using a cuticle stick to avoid damaging your nails.
Taking your time and using the right tools can make the process much smoother. Remember, rushing through gel removal can lead to nail damage. Learn more about removing gel nails at home for a safe and effective process.
Conclusion
So, there you have it! Taking off gel nails at home isn’t as daunting as it seems. With the right tools and a bit of patience, you can safely remove them without a hitch. Just remember to gather everything you need before starting, and don’t rush the process. Your natural nails will thank you for the care and attention. Plus, once you’re done, you can let your nails breathe or try out a new style. Keep experimenting and enjoy the journey of nail care at home. Happy nail adventures!
Frequently Asked Questions
How often should you take off gel nails?
It’s best to remove gel nails every 2-3 weeks to let your natural nails breathe and prevent damage.
Do gel nails harm your natural nails?
Gel nails can cause damage if removed incorrectly. It’s important to follow proper removal steps to keep your nails healthy.
What if my nails hurt after removing gel?
If you feel pain after removing gel nails, it might be due to over-filing or improper removal. Consider consulting a nail professional for advice.
What are some tips for beginners removing gel nails?
Start by gathering all necessary tools, follow a step-by-step guide, and be patient. Avoid rushing the process to prevent nail damage.
Can I remove gel nails without acetone?
While acetone is the most effective, you can try soaking nails in warm soapy water to loosen the gel, but it might take longer.
How can I strengthen my nails after gel removal?
Use a nail strengthener, keep your nails hydrated, and avoid harsh chemicals to help them recover after gel removal.
Seja o primeiro a comentar!