

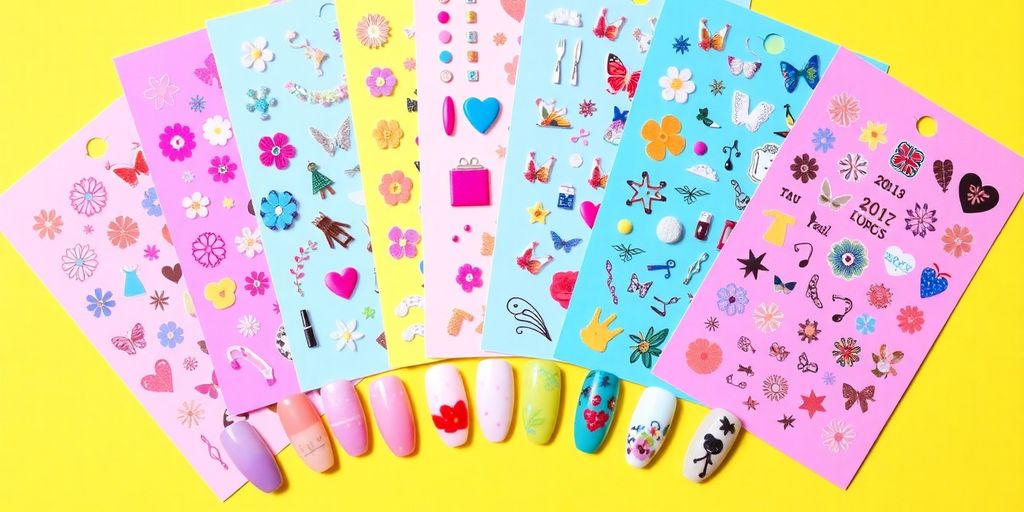
Quick and Easy Nail Art Stickers for a Perfect Look
Compartilhe agora mesmo:
Ever felt like your nails need a little extra something but don’t have the time or patience for a full manicure? Nail art stickers might just be your new best friend. These little gems can transform your nails from drab to fab in minutes, giving you a salon-quality look without leaving your home. Whether you’re into bold designs or prefer something subtle, there’s a sticker out there for you. Plus, with so many DIY options, you can get creative and make your own unique designs. Let’s dive into the world of nail art stickers and see how they can give your nails the perfect look.
Key Takeaways
- Nail art stickers provide a quick and easy way to enhance your nail look without the hassle of traditional polish.
- There are various designs available to suit every style, from bold patterns to subtle accents.
- DIY nail art stickers offer a creative outlet for personalizing your manicure at home.
- Layering and combining stickers with other techniques can create unique and eye-catching designs.
- Proper application and care can extend the life of your nail art stickers, making them a cost-effective beauty solution.
The Art of Nail Stickers: Transform Your Look Effortlessly
Nail stickers are a game-changer for anyone looking to spice up their nail game without the hassle of traditional polish. They offer a quick and stylish solution for those who want salon-quality nails without the time commitment. Whether you’re heading to a party or just want to add a bit of flair to your everyday look, nail stickers can do the trick.
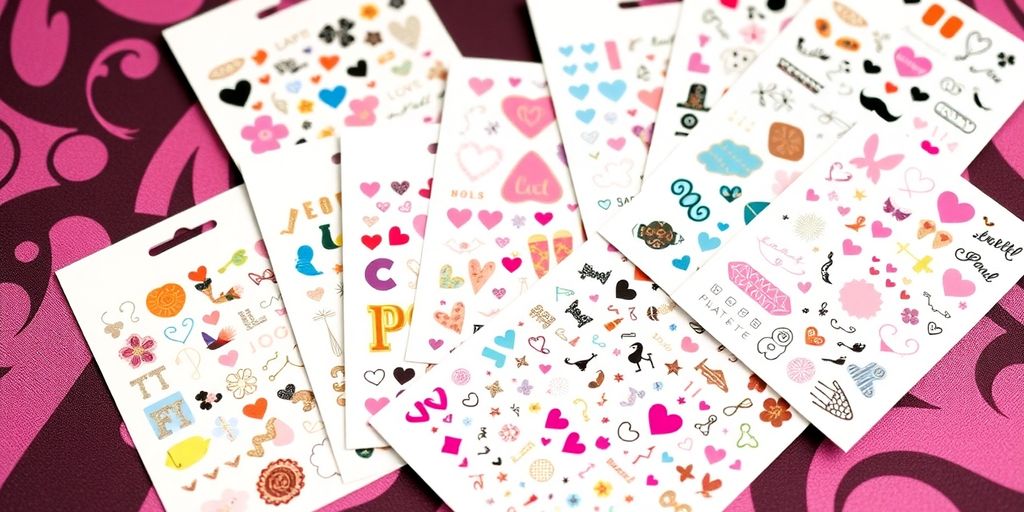
Choosing the Right Design for Your Style
Picking the perfect nail sticker design can be a fun process. Consider your personal style and the occasion. Are you going for something bold and bright, or do you prefer a more subtle and chic look? There are countless designs to choose from, so take your time to find one that truly speaks to you. Remember, your nails are an extension of your personality!
Applying Nail Stickers Like a Pro
Applying nail stickers is easier than you might think. Start with clean, dry nails. Peel the sticker off the backing and place it on your nail, smoothing it out to avoid any bubbles. Finish with a top coat to seal the sticker in place and give it a glossy finish. It’s that simple! If you want to ensure longevity, consider adding a couple of extra layers of top coat, paying attention to the edges.
Maintaining Your Nail Art for Longevity
To keep your nail art looking fresh, it’s important to take care of them. Avoid activities that might chip or peel the stickers. When cleaning or doing dishes, wear gloves to protect your nails. A little care goes a long way in maintaining your stylish look. With the right maintenance, your nail stickers can last for over a week.
DIY Nail Art Stickers: A Creative Approach to Personal Style
Materials Needed for DIY Nail Stickers
Creating your own nail art stickers is a fun and rewarding process. Here’s what you’ll need:
- Parchment paper: Essential for easily lifting your designs.
- Nail polish: Choose your favorite colors.
- Small scissors: For trimming your stickers to the perfect size.
- A fine-tipped brush or toothpick: To add details to your designs.
Step-by-Step Guide to Creating Your Own Stickers
- Prepare Your Workspace: Lay out a sheet of parchment paper. This will be your canvas.
- Design Your Stickers: Paint ten rectangles larger than your nails. Use multiple coats to achieve the desired opacity.
- Decorate: Get creative with patterns or shapes. Polka dots, stripes, and stars are easy and look great.
- Dry Overnight: Let your designs sit overnight to ensure they are fully cured.
- Peel and Trim: Carefully peel the stickers from the parchment paper and trim them to fit your nails.
- Apply: While the base coat on your nails is still wet, press the sticker onto the nail and smooth it out.
Tips for Perfecting Your DIY Nail Art
- Use a thick top coat to seal your design and extend its life.
- If you’re having trouble lifting the stickers, try using a pin or your fingernail for a more precise grip.
- Experiment with different shapes and sizes to find what works best for your style.
Making your own nail art stickers not only saves money but also allows you to express your personal style. It’s a simple way to add a unique touch to your nails without the salon price tag. Plus, with over 1500 nail decals featuring classic designs, you can draw inspiration and create your own twist on popular trends.
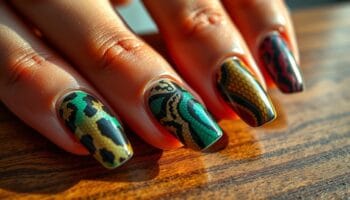
Top Trends in Nail Art Stickers for Every Season
Spring and Summer Nail Sticker Trends
As the days get longer and brighter, nail art trends follow suit. This year, bold and carefree styles are taking center stage. Think updated glazed donut nails, sparkling ombrés, and playful designs like cow print. These styles not only scream fun but also add a pop of color to any outfit. If you’re looking to make a statement, these are the designs to try.
- Updated Glazed Donut Nails: A fresh take on the classic, with a shiny, glossy finish.
- Sparkling Ombrés: Transition your nails from one color to another with a touch of sparkle.
- Playful Cow Print: Bring out your wild side with these fun and quirky designs.
Fall and Winter Nail Sticker Inspirations
When the leaves start to change and the air gets a bit crisper, so do the nail trends. Fall and winter bring deeper tones and more intricate designs. Think rich burgundies, deep blues, and festive metallics. These styles are perfect for adding a touch of sophistication to your look.
- Rich Burgundies: A classic fall color that never goes out of style.
- Deep Blues: Perfect for winter, these shades add depth to your nails.
- Festive Metallics: Add a bit of sparkle to your holiday season with metallic shades.
Celebrity-Inspired Nail Art Sticker Designs
Celebrities are always ahead of the curve when it comes to fashion, and nail art is no exception. This season, take inspiration from the stars with designs that are both trendy and chic. From minimalist designs to more elaborate patterns, there’s something for everyone.
- Minimalist Designs: Less is more with these simple yet elegant styles.
- Elaborate Patterns: Go all out with intricate designs that are sure to turn heads.
- Star-Studded Styles: Take a cue from your favorite celebrities and try out their signature looks.
Nail art stickers are a great way to express your style without the commitment of traditional nail polish. Whether you’re going for a bold look or something more subtle, there’s a sticker design out there for you. Embrace the trends and let your nails do the talking this season.
Nail Art Stickers vs. Traditional Nail Polish: Pros and Cons
Benefits of Using Nail Art Stickers
Nail art stickers are a game-changer for nail enthusiasts. They offer a quick and easy way to achieve intricate designs without the hassle of painting them by hand. Here are some benefits:
- Time-Saving: Applying stickers is much faster than waiting for multiple layers of polish to dry.
- Versatility: With a wide range of designs available, you can switch up your look as often as you like.
- Precision: Get salon-quality designs without needing a steady hand or artistic skills.
Nail stickers allow you to express your creativity without the mess or stress of traditional nail polish.
Challenges with Traditional Nail Polish
While traditional nail polish has its own charm, it comes with a few challenges:
- Drying Time: Waiting for polish to dry can be tedious and often results in smudges.
- Skill Requirement: Achieving detailed designs requires a steady hand and practice.
- Longevity: Polish tends to chip easily, requiring frequent touch-ups.
Making the Switch: What to Expect
Transitioning from traditional polish to nail stickers can be a breeze if you know what to expect:
- Preparation: Ensure your nails are clean and dry before applying stickers for the best adhesion.
- Application: Follow instructions carefully to avoid bubbles and ensure a smooth finish.
- Maintenance: To prolong the life of your stickers, apply a clear topcoat and avoid soaking your hands in water for extended periods.
Switching to nail stickers can revolutionize your nail game, offering a fresh and creative approach to nail art.
How to Choose the Best Nail Art Stickers for Your Needs
Understanding Different Types of Nail Stickers
Nail stickers come in a variety of styles, each offering unique benefits. From simple decals to intricate wraps, there’s something for everyone. Decals are great for adding small designs to your nails, while full wraps can cover the entire nail with a pattern or color. Some stickers are made for specific nail shapes, so it’s important to know your nail type before purchasing.
Factors to Consider When Buying Nail Stickers
When shopping for nail stickers, consider the following:
- Durability: Look for stickers that promise long-lasting wear. Some are designed to last a week, while others might only last a few days.
- Ease of Application: If you’re a beginner, choose stickers that are easy to apply and remove.
- Design Variety: Make sure the brand offers a wide range of designs that suit your style.
Top Brands for Quality Nail Art Stickers
Choosing the right brand can make all the difference. Brands like Sally Hansen, Incoco, and Dashing Diva are known for their quality and variety. They offer everything from minimalist designs to bold, artistic patterns. It’s worth investing in a brand that uses high-quality materials to ensure your nails look fabulous and the stickers stay put longer.
Nail stickers are a fun and easy way to express your style. With so many options available, you can switch up your look whenever you want without the commitment of traditional nail polish. Whether you prefer subtle designs or bold statements, there’s a nail sticker out there for you.
Innovative Nail Art Sticker Techniques to Try at Home
Layering Stickers for a Unique Look
Layering nail stickers can create a stunning and personalized design. Start by choosing a base color or sticker that complements your style. Layer different stickers over each other to build depth and complexity. Consider using transparent stickers for a subtle effect or bold patterns for a striking appearance.
Here’s a simple way to get started:
- Apply a base coat to your nails and let it dry completely.
- Place the first layer of stickers, ensuring they are firmly pressed onto the nail.
- Add additional layers, varying the position and angle for each sticker.
- Seal with a top coat to secure your layered masterpiece.
Combining Stickers with Other Nail Art Techniques
Mixing stickers with other nail art techniques can elevate your manicure to the next level. Try combining stickers with:
- Ombre Effects: Use a sponge to blend colors before applying stickers for a gradient look.
- Glitter Accents: Add a touch of sparkle around the stickers for a glamorous finish.
- Hand-Painted Details: After placing your stickers, use a fine brush to add intricate designs or highlights.
Creating Custom Designs with Nail Stickers
Creating custom nail stickers allows for a personalized touch in nail art, enhancing creativity and self-expression. Nail decals can be used to decorate nails in unique ways. To make your own, follow these steps:
- Cut parchment paper into small rectangles, slightly larger than your nails.
- Paint your desired design onto the parchment paper. Allow it to dry thoroughly.
- Carefully peel the sticker from the paper and apply it to your nail.
- Finish with a top coat to protect your design and add shine.
Experimenting with different techniques and materials can transform your nail art from ordinary to extraordinary. Don’t be afraid to mix and match styles to find what works best for you.
Caring for Your Nails After Using Nail Art Stickers
Removing Nail Stickers Safely
Taking off nail art stickers can be tricky, but doing it right helps keep your nails healthy. Start by soaking your nails in warm, soapy water for a few minutes. This helps loosen the adhesive. Gently peel off the stickers, starting from the edges. If they’re stubborn, use a little bit of nail polish remover on a cotton pad to help dissolve the glue. Avoid pulling them off forcefully as this can damage your nail surface.
Nail Care Tips for Healthy Nails
After removing the stickers, your nails might need some TLC. Trim and file them to your preferred shape. Moisturize your nails and cuticles with a nourishing oil or cream to keep them hydrated. It’s a good idea to let your nails breathe for a few days before applying new stickers or polish. This downtime helps in maintaining their strength and flexibility.
Products to Use for Nail Recovery
To boost nail recovery, consider using a strengthening base coat. Look for products with ingredients like keratin or biotin, which are known to fortify nails. A hydrating cuticle oil can also work wonders in maintaining nail health. Here’s a quick list of essentials:
- Nail Strengthening Base Coat
- Hydrating Cuticle Oil
- Nourishing Hand Cream
Taking care of your nails after using stickers not only keeps them looking good but also ensures they are strong and healthy for future nail art adventures.
Wrap Up
So, there you have it! Nail art stickers are a game-changer for anyone looking to jazz up their nails without the fuss. They’re super easy to use, and the best part? You don’t have to be a pro to get that salon-quality look. Just peel, stick, and you’re good to go. Plus, with so many designs out there, you can switch up your style as often as you like. Whether you’re into bold patterns or something more subtle, there’s a sticker for every mood. So why not give it a try and see how fun and easy nail art can be?
Frequently Asked Questions
What are nail art stickers?
Nail art stickers are decorative adhesives that you can easily apply to your nails to create fun and unique designs without the mess of traditional nail polish.
How do I apply nail art stickers?
To apply nail art stickers, first clean your nails, then peel off the sticker and place it on your nail. Press down firmly and finish with a top coat to make it last longer.
Can I make my own nail art stickers at home?
Yes, you can make your own nail art stickers at home using materials like parchment paper and nail polish. Just paint your design, let it dry, and peel it off to use.
How long do nail art stickers last?
Nail art stickers can last up to a week or more, especially if you apply a top coat over them to protect the design.
Are nail art stickers better than regular nail polish?
Nail art stickers are quicker and less messy than regular nail polish, making them a great option for easy and creative nail designs.
How do I remove nail art stickers safely?
To remove nail art stickers, soak your nails in warm, soapy water and gently peel them off. You can also use a nail polish remover if needed.
Seja o primeiro a comentar!