

Nail It: Fun and Trendy Nail Extension Designs
Compartilhe agora mesmo:
Hey there, nail art lovers! If you’re on the hunt for some fresh nail extension design ideas, you’re in the right place. Whether you’re into sparkles, chic marble, or bold colors, there’s something here that’ll catch your eye. Get ready to dive into a world of creativity and fun with your nails. Let’s explore these trendy designs that’ll have your fingertips looking fabulous.
Key Takeaways
- Glitter and rhinestones bring a festive vibe to your nails, perfect for special occasions.
- Marble and metallic designs add a touch of sophistication to your nail extensions.
- Nude and ombre styles offer timeless elegance, suitable for any event.
- Bold and bright colors make a statement, ensuring your nails stand out.
- French tips with modern twists keep the classic look fresh and exciting.
Glitter and Rhinestones: Adding Sparkle to Your Nail Extension Design
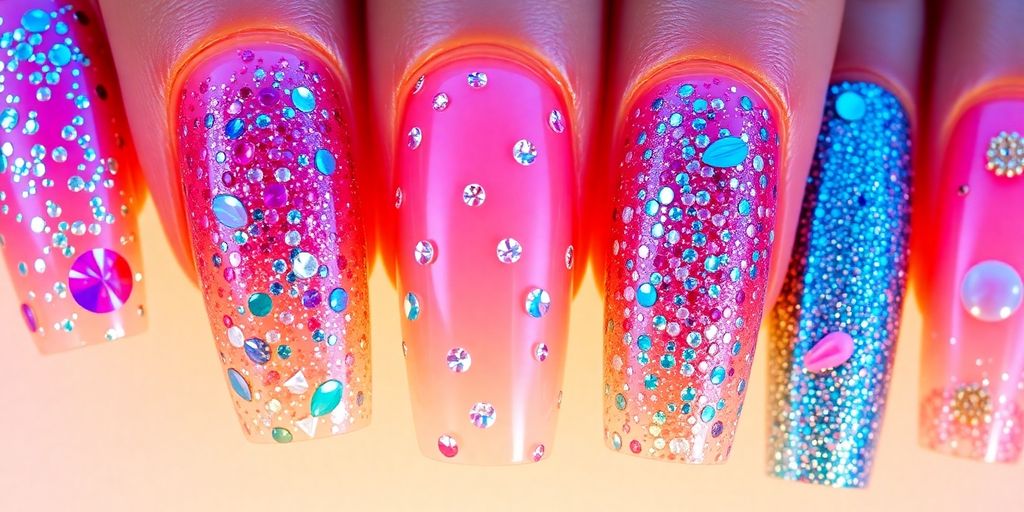
Choosing the Right Glitter for Your Nails
When it comes to glitter, it’s all about finding the perfect balance. You want something that shines but doesn’t scream. I usually go for fine glitter if I’m looking for a subtle sparkle, and chunky glitter for a more dramatic effect. Mixing different sizes can really make your nails pop. Think of it like choosing the right jewelry for an outfit—sometimes less is more, and other times, you want to go all out.
How to Apply Rhinestones for Maximum Impact
Rhinestones can turn a basic manicure into something fabulous. Here’s how I do it:
- Pick Your Rhinestones: Decide on the size and color. Smaller stones are great for a delicate look, while larger ones make a bold statement.
- Placement is Key: I like to plan my design on paper first. You can go for a single accent nail or sprinkle them across all your nails.
- Secure Them Well: Use a tiny dot of nail glue and a pair of tweezers to place each stone. Press gently to make sure they stick.
Maintaining Your Glitter and Rhinestone Nails
Keeping your glitter and rhinestone nails looking fresh requires a bit of care. First, avoid using your nails as tools—trust me, I’ve learned the hard way. Secondly, apply a clear topcoat every few days to keep everything in place. Lastly, be gentle when doing everyday tasks, like opening cans or typing. This way, your nails can stay fabulous for as long as possible.
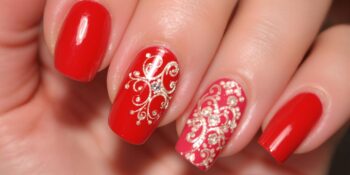
The complete glitter manicure combines a glitter and chrome base with a 3D layer of rhinestones, creating a look reminiscent of jewelry that can be sprinkled on for added flair. Learn more about this style.
Marble and Metallic: A Sophisticated Nail Extension Design
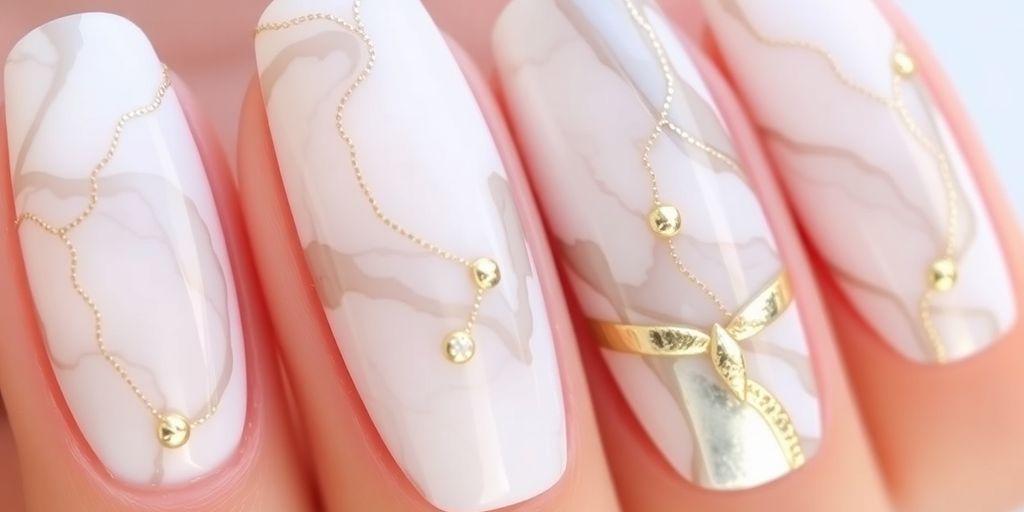
Creating the Perfect Marble Effect
So, you want to nail that marble look? First, pick out your favorite colors. Traditional marble vibes come from mixing whites, blacks, and grays. But hey, don’t be afraid to experiment with other shades too! Here’s a quick way to get the look:
- Base Coat: Start with a clean base coat to protect your nails.
- Color Swirls: Use a thin brush to swirl your chosen colors on the nail. Be random; marble is all about that natural look.
- Blend: While the polish is still wet, use a toothpick or fine brush to blend the colors slightly.
- Seal: Finish with a top coat to lock in the design.
Marble nails are like tiny pieces of art on your fingertips. They give off a chic and polished vibe, perfect for any occasion.
Incorporating Metallic Accents
Metallics are your best friend when you want to add some shine. Whether it’s a full-on metallic nail or just a hint of shimmer, these accents can really pop. Here are some ideas:
- Use metallic foil for a quick and easy application.
- Try metallic polish on just one or two nails for an accent.
- Add metallic lines or shapes using nail tape or a steady hand.
Combining Marble and Metallic for a Unique Look
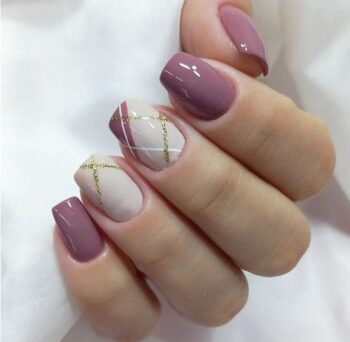
Mixing marble with metallics? Now that’s a match made in nail heaven! Start with your marble base, then add metallic touches. Think gold or silver lines running through the marble design or a metallic nail next to a marble one. This combo makes for a stunning contrast that’s bound to get noticed.
For those who love nails marble designs, this is the perfect way to elevate your style. The blend of textures and colors creates a sophisticated yet edgy look. Don’t be surprised if your nails become the talk of the town!
Nude and Ombre: Timeless Elegance in Nail Extension Design
Selecting the Best Nude Shades
When it comes to picking the perfect nude shade for your nails, it’s all about matching your skin tone. You wouldn’t believe how many shades of nude there are! From soft pinks to warm beiges, the options are endless. Finding the right nude can make your nails look effortlessly chic and elongated. I usually go for a shade that’s just a touch lighter than my skin tone for that clean, polished look. And hey, if you’re feeling adventurous, try mixing in a bit of shimmer for a subtle twist!
Mastering the Ombre Technique
Ombre nails are like the cool cousin of nail designs. They look super fancy but are surprisingly easy to achieve. Start with a base coat of your chosen nude, then pick a complementary color for the gradient. Here’s a simple way to do it:
- Apply the base color and let it dry completely.
- Use a makeup sponge to dab the second color onto the tips of your nails.
- Blend the two colors gently by dabbing the sponge lightly where they meet.
Finish with a top coat to smooth it all out, and you’ve got yourself a stunning ombre effect. Trust me, once you try it, you’ll want to experiment with all sorts of color combos.
Enhancing Nude Nails with Subtle Accents
Sometimes, a little goes a long way. Enhancing your nude nails with subtle accents can really make them pop without going overboard. Think delicate metallic strips or tiny rhinestones placed strategically. Or how about a touch of glitter at the tips for a bit of sparkle? You could even try a minimalist design like a single line or dot for a modern look.
Nude nails are like a blank canvas, giving you the freedom to express your style in the most understated way.
And don’t forget, nail trends for 2025 are leaning towards moody colors and chromes, so feel free to incorporate those into your nude palette for a trendy twist. Whether you’re keeping it simple or adding a bit of flair, nude and ombre nails are timeless and classy.
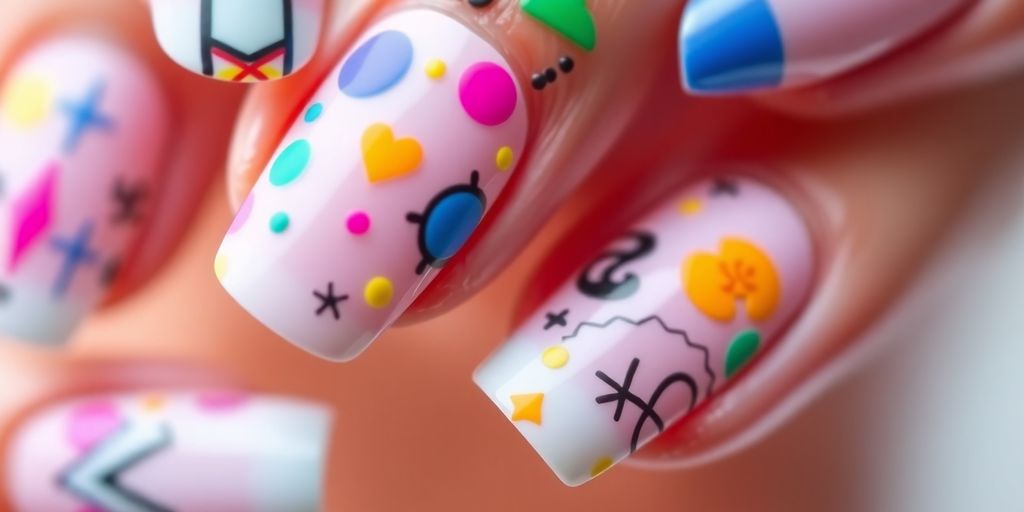
Bold and Bright: Making a Statement with Nail Extension Design
Exploring Neon and Bright Colors
When it comes to nail designs, nothing catches the eye quite like vibrant hues. Neon and bright colors are not just a summer fling; they are a year-round way to express your personality. Whether you’re into neon pinks, electric blues, or sunshine yellows, these colors can make your nails pop. Bold colors are a surefire way to stand out and make a statement.
- Neon French Tips: Neon French tips are a modern twist on the classic look, offering a playful yet chic vibe. You can explore a variety of colorful nail ideas, including neon French manicures perfect for short nails.
- Bright Solids: Opt for a solid bright color for a clean and striking look. Pair it with a glossy top coat for that extra shine.
- Gradient Designs: Blend multiple bright colors together for a gradient effect that adds depth and interest to your nails.
Mixing Patterns for a Bold Look
Mixing patterns can be intimidating, but it’s a fun way to add character to your nails. The key is to choose patterns that complement each other without clashing. Start with a base color, then add stripes, polka dots, or geometric shapes for a unique design.
- Choose a Base Color: Start with a neutral or bold base color that will make the patterns pop.
- Select Your Patterns: Mix and match patterns like stripes and dots, or even animal prints for a daring look.
- Layer Wisely: Ensure each pattern has its own space to shine without overwhelming the design.
Tips for Long-Lasting Bright Nail Designs
Keeping your vibrant nails looking fresh can be a challenge, but with the right care, you can extend their life.
- Use a Quality Base Coat: A good base coat will protect your nails and help the color adhere better.
- Seal with a Top Coat: Finish with a top coat to add shine and prevent chipping.
- Avoid Harsh Chemicals: Keep your nails away from harsh chemicals like cleaning products, which can dull the color.
Bright nails are more than just a fashion statement; they’re a reflection of your bold personality. Embrace the colors, mix those patterns, and let your nails do the talking!
French Tips with a Twist: Modern Takes on a Classic Nail Extension Design
Experimenting with Colorful French Tips
I love how the classic French tip is getting a vibrant makeover. Instead of sticking to the usual white, why not try a rainbow of colors? Think bright pinks, lively greens, or even a mix of pastels. Adding color to your French tips can make your nails pop and bring some fun to your look. You can even match the colors to your outfits or the season. I once tried a mix of sunset shades, and it was a hit at the summer party!
Adding Patterns to French Tips
Patterns are another way to shake things up. You can go for geometric designs, swirls, or even tiny floral patterns. I find that patterns add a unique touch to the nails without being too overpowering. It’s like having a tiny piece of art on each finger. If you’re feeling adventurous, try combining different patterns on each nail for a truly eclectic vibe.
Innovative Shapes for French Tip Nails
Who says French tips have to be round? Playing with different shapes like square or almond can completely change the look. Square tips give a modern edge, while almond shapes add elegance. I’ve seen some amazing designs where the tips are shaped into tiny triangles or even zigzags. It’s all about experimenting and finding what suits your style best.
French tips aren’t just for the classic look anymore. They’re a canvas for creativity and self-expression. Whether it’s through color, pattern, or shape, there’s a unique French tip design for everyone.
For more inspiration on how to explore innovative French tip nail designs that incorporate vibrant colors and geometric patterns, check out some fresh ideas to enhance your manicure.
3D and Textured: Adding Dimension to Your Nail Extension Design
Choosing the Right 3D Elements
When it comes to 3D nail designs, the possibilities are endless. You can go for delicate floral patterns or bold geometric shapes. Personally, I love incorporating small charms or studs. They add that extra pop to the nails. It’s important to choose elements that not only match your style but also fit the occasion. For a more formal event, you might want to opt for subtle pearls or crystals. But for a night out, don’t be afraid to go wild with vibrant colors and oversized pieces.
Applying Textured Nail Art
Applying textured nail art can be a bit tricky, but it’s totally worth the effort. Here’s how I usually do it:
- Prep your nails by cleaning and buffing them.
- Apply a base coat to protect your natural nails.
- Place the 3D elements on the nail while the polish is still tacky.
- Use a top coat to seal everything in, ensuring that those elements stay put.
The key is to work quickly and carefully. If you’re using nail glue, make sure to use just a tiny bit to avoid any mess.
Caring for 3D and Textured Nails
Once you’ve got your stunning 3D nails, you need to maintain them. Avoid using your nails as tools—that’s the quickest way to lose a charm or two. Be gentle when washing your hands and steer clear of harsh chemicals. Regular touch-ups might be necessary to keep everything looking fresh. And remember, if a piece falls off, don’t panic. You can always reattach it with a bit of nail glue.
3D nail designs provide a unique and artistic appearance, offering a more personalized touch compared to traditional nail art. These designs are often handcrafted, showcasing creativity and individuality.
3D nails are all about expressing your personality, so don’t be afraid to experiment and have fun with it. Whether you’re into 3D nail designs or textured patterns, there’s something out there for everyone. Just remember to enjoy the process and let your creativity shine!
Seasonal Inspirations: Nail Extension Designs for Every Occasion
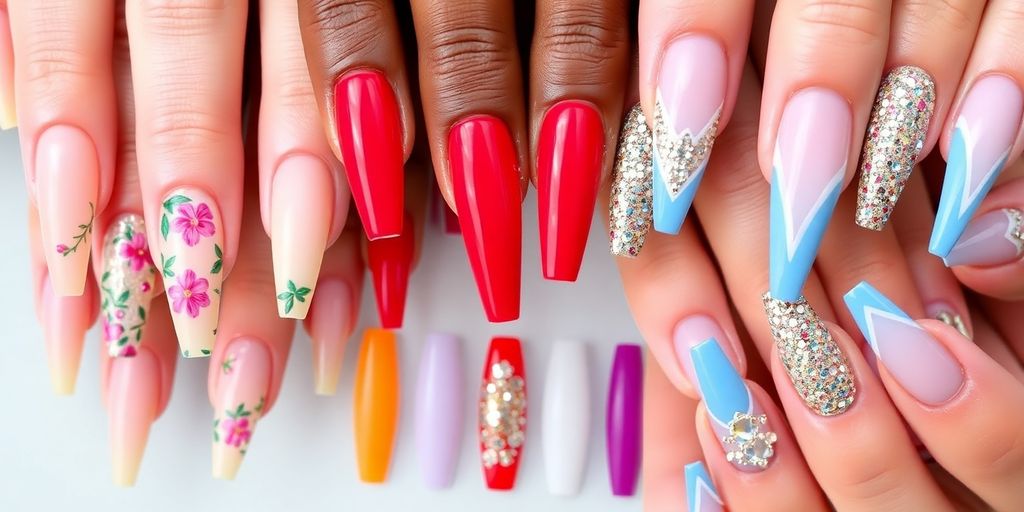
Spring and Summer Nail Trends
Spring and summer are all about embracing bright colors and fresh designs. Think floral patterns, pastel shades, and playful motifs. Some of my favorite trends include:
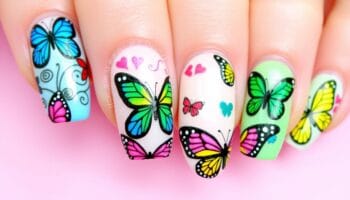
- Floral Accents: Perfect for spring, adding tiny flowers or leafy designs can make your nails pop.
- Pastel Ombre: Transitioning soft colors like mint, peach, or lavender is a great way to welcome warmer weather.
- Neon Tips: Summer is the season to be bold. Try neon tips for a fun twist on the classic French manicure.
When the sun is shining, and everything’s in bloom, there’s no better time to experiment with vibrant colors and playful designs. It’s like wearing a little piece of summer on your fingertips.
Fall and Winter Nail Ideas
As the days get cooler, nail designs shift to deeper shades and cozy themes. You might want to try:
- Rich Hues: Think burgundy, navy, and forest green – these colors scream autumn.
- Matte Finishes: A matte topcoat can add a sophisticated edge to any color.
- Winter Nail Designs: Embrace the chill with frosty patterns or cozy, warm tones like hot chocolate nails.
Holiday-Themed Nail Designs
The holiday season is the perfect excuse to go all out with your nail art. Here are some ideas to get you started:
- Glitter Galore: Add some sparkle to your nails with glitter polish or rhinestones.
- Festive Patterns: Think candy canes, snowflakes, or even little reindeer.
- Metallic Magic: Silver and gold polishes can give your nails a festive, luxurious look.
Conclusion
So there you have it, a bunch of fun and trendy nail extension designs to try out! Whether you’re into glitter, metallics, or something more subtle, there’s a style for everyone. Nail extensions are a great way to express yourself and add a little flair to your look. Don’t be afraid to mix and match different elements to create something unique. Remember, the most important thing is that your nails make you feel good and confident. So go ahead, experiment, and enjoy the process of finding your perfect nail design!
Frequently Asked Questions
How do I choose the right glitter for my nails?
Pick glitter that matches your style and the occasion. Bigger glitters are more dramatic, while small ones are subtle.
What’s the best way to apply rhinestones on nails?
Use a small dot of nail glue or top coat to stick rhinestones. Place them carefully with a tweezer or nail art stick.
How can I keep my glitter and rhinestone nails looking good?
Apply a clear top coat every few days to keep them shiny and prevent chipping.
How do I create a marble effect on my nails?
Mix two or three polish colors using a toothpick or nail brush to swirl them gently on your nails.
What are some easy ways to add metallic accents to nails?
Use metallic nail polish or nail foils for a shiny effect. You can also add metallic stickers for easy application.
What’s a simple way to achieve an ombre nail look?
Use a makeup sponge to dab two colors onto your nails, blending them where they meet for a smooth gradient.
Seja o primeiro a comentar!