

Nail Art Ombre: Blending Colors for Mesmerizing Manicures
Compartilhe agora mesmo:
Nail Art Ombre: Blending Colors for Mesmerizing Manicures
What makes ombre nails so timeless and captivating? How can I create my own unique nail art ombre designs at home? The rise of gradient nail design has made ombre nails a beauty and fashion staple. As someone who loves trying new nail art, I’m excited to dive into ombre nails and share my discoveries with you.
Ombre nails offer endless possibilities, from brown to glitter designs. They’re perfect for a natural look or something bold for a special event. With the right tools and techniques, you can get a professional-looking gradient nail design that will surely impress.
Key Takeaways
- Ombre nails are a timeless and versatile nail art technique that can be customized to fit individual tastes.
- Gradient nail design involves layering different polish colors and blending them together using a sponge or other tools.
- Brown ombre nails are a great choice for adding natural beauty to your look, while glitter ombre nails offer a range of expressions suitable for various occasions.
- To create ombre nails at home, you’ll need essential items like a 2-in-1 Gel Base Coat, Ombre 01 Brush, and TGB Light the Way Nail Lamp.
- Online Nail Art Workshops, such as those offered by TGB Academy, can help you enhance your skills and learn new designs.
- With practice and patience, you can achieve a professional-looking ombre nail design that’s sure to impress.
Essential Tools and Materials for Creating Ombre Nails
To get a beautiful ombre nail design, you need the right tools and materials. If you’re new, you might wonder where to begin. For a diy ombre nails project, you’ll need a gel polish starter kit, nail cleanser, and a UV or LED lamp.
Choosing ombre nail colors is endless. You can pick from many gel polish colors, like pastels, bold brights, and neutral tones. For a stunning ombre, pick two or three colors that go well together. You can find lots of nail art tutorial guides online, including step-by-step and video tutorials.
Here are some key tools and materials to start:
- Gel polish starter kit
- Nail cleanser
- UV or LED lamp
- Cuticle pushers
- Nail brushes
- Isopropyl alcohol
Popular gel polish brands for ombre nails include Kokoist and Vetro. Kokoist has a “Gradation white” shade for a soft ombre look. Vetro has colors with two stars on the label, great for ombre.
With the right tools and materials, you can make stunning ombre nail designs. Whether you’re new or experienced, the secret to a beautiful ombre is to practice and have fun.
| Tool/Material | Description |
|---|---|
| Gel polish starter kit | Includes everything you need to get started with gel polish, including a base coat, top coat, and color polish |
| Nail cleanser | Used to clean and prepare the nail surface for gel polish application |
| UV or LED lamp | Used to cure the gel polish and create a long-lasting finish |
Understanding the Basics of Nail Art Ombre Techniques
To master ombre nail techniques, you need to know the basics. Start with the fundamentals and practice often. There are various methods to achieve the ombre effect, and it might take some tries to find what works for you.
Some common techniques include using a sponge to apply colors and waiting before adding more colors. Blending colors seamlessly is key for a beautiful ombre effect. Try different sponges and topcoats to improve the look. For instance, a topcoat that smudges a bit can make the color transition softer.
Here are some tips for beginners:
- Start with a light base color and gradually build up to darker shades
- Use a sponge to apply colors, and wait before layering additional colors
- Press harder at the top for a darker hue
- Experiment with different sponges and topcoats to achieve the desired effect

Remember, practice makes perfect. Don’t get discouraged if it takes a few tries to get ombre nail techniques right. With patience and practice, you can create stunning ombre nails and enhance your nail art skills.
| Nail Art Level | Techniques | Percentage of Artists |
|---|---|---|
| Basic | Polka dot designs, stripe designs, gradient nails | 40%, 25%, 60% |
| Intermediate | Stamping designs, water marbling, ombre nails | 50%, 55%, 40% |
| Advanced | Encapsulated nail art, stiletto nails, almond-shaped nails | 25%, 15%, 35% |
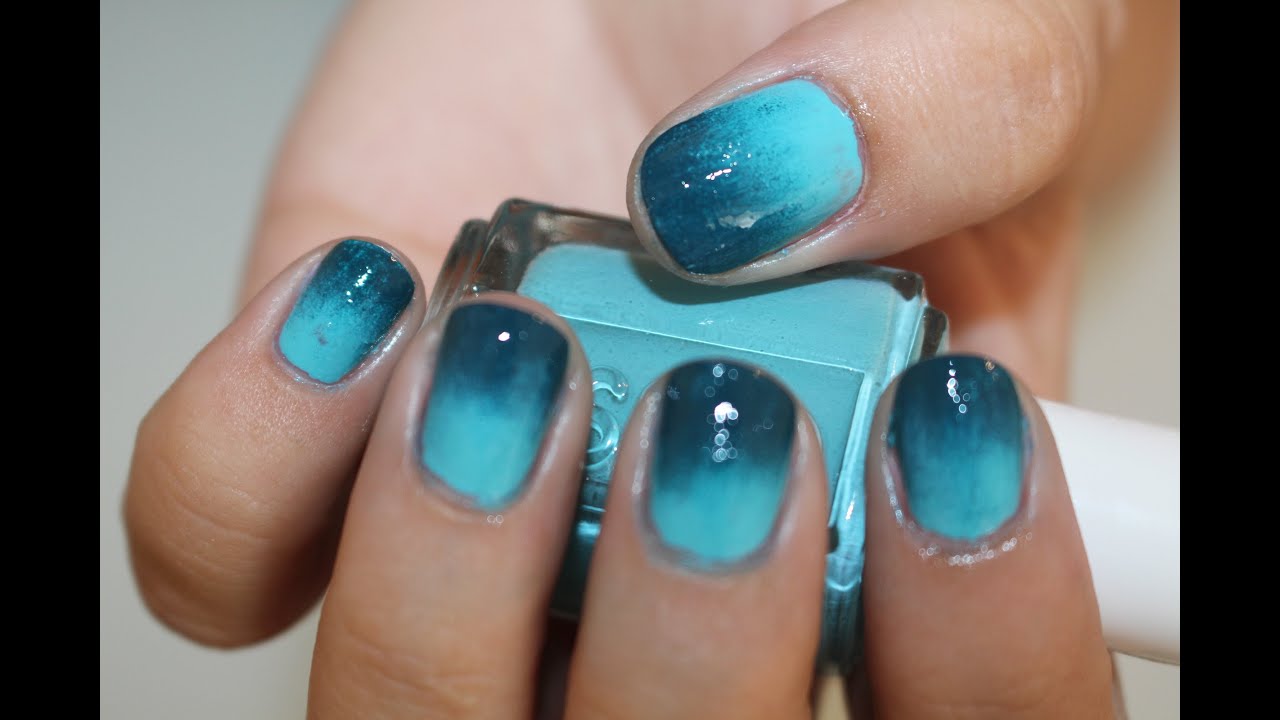
Step-by-Step Tutorial for Perfect Color Blending
To get the perfect ombre nail art, follow a detailed nail art tutorial. First, apply a clear base coat to prevent stains and make your nails last longer. Then, pick two or three colors that look good together for a stunning gradient nail design. You can find cool ombre nail ideas online or try out different color mixes.
Start with a thin layer of the lighter color on your nails. Then, add a layer of the blended polish for the ombre look. Use a small sponge to apply the polish, moving it from side to side for a smooth blend. This might take some practice, but it’s worth it for the beautiful result.

- Use a clear topcoat to seal and finish your nails
- Apply a thin layer of polish to avoid pooling or streaking
- Experiment with different color combinations to find your favorite ombre nail ideas
| Nail Art Technique | Description |
|---|---|
| Ombre Nail Art | A gradient effect achieved by blending two or three colors |
| Sponging | A technique used to apply polish to the nails using a small sponge |
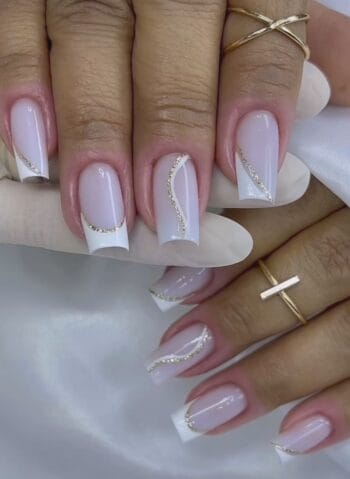
Creative Variations and Color Combinations
Ombre nail ideas are endless. You can pick from many ombre nail colors to make your nails unique. Try neutral shades like nude, beige, or soft pink for a chic look.
For something bold, try colors like blue, purple, or yellow. Pastel rainbow ombre nails are great for spring and summer. Neon ombre nails add a fun edge to your look. Look for inspiration on Instagram, where many nail artists share their work.

- Glitter ombre nails for a glamorous touch
- Matte and shine combo ombre nails for a sophisticated look
- Negative space ombre nails for a modern and edgy design
- French ombre twist for a classic and elegant look
With these ideas, you can make your ombre nails stand out. Create looks that show off your personality and style.
Conclusion: Mastering Your Ombre Nail Art Journey
We’ve explored the world of nail art ombre together. Now, you have the skills to make stunning manicures. Ombre nails let you play with colors and techniques to match your style.
Whether you’re new to nail art or already skilled, you can master ombre nail art. With the right tools, practice, and creativity, your nails can become art pieces. They’ll amaze and inspire everyone who sees them.
Ombre nail art is all about expressing yourself and creating something special. So, let your imagination run wild. Dive into the world of ombre nail art. Your nails will love you for it!
FAQ
What is nail art ombre?
Nail art ombre is a gradient nail design. It blends two or more colors from the base to the tip. This creates a stunning, multi-tonal effect.
What are the essential tools and materials needed for creating ombre nails?
You’ll need a base coat, the desired ombre colors, and a makeup sponge or ombre nail brush. Don’t forget a top coat to seal the design.
How do I choose the right colors for my ombre nail art?
Choose colors that match your skin tone and personal style. Look for colors that blend well together. Try out different combinations to find your favorite ombre look.
What are the basic techniques for achieving the ombre nail look?
The main techniques are the gradient effect and the sponging method. The gradient blends colors from base to tip. The sponging method uses a makeup sponge to apply colors directly to the nail.
Can I create ombre nails at home?
Yes, you can! With the right tools and practice, you can achieve professional ombre nails at home. This article provides a step-by-step guide from preparation to finishing touches.
How can I add creativity to my ombre nail art?
Try new color combinations, like glitter or chrome. Experiment with unique nail shapes and patterns. Add embellishments to make your ombre nails stand out.

Seja o primeiro a comentar!