
Nail Art Ideas: Embracing Simplicity with Stunning Designs
Compartilhe agora mesmo:
Nail Art Ideas: Embracing Simplicity with Stunning Designs
What makes a nail art design stand out? Is it the detailed work or the simple look? With countless nail art ideas, picking the right one can be tough. From trendy to elegant, the choices are endless. I think simplicity is key to stunning nail art, and I’m excited to share how to achieve it.

Nail art has become a way to express oneself, thanks to social media. Whether you’re new or experienced, there’s always something new to learn. Let’s explore nail art ideas and designs together.
Key Takeaways
- Nail art is a fun and creative way to express oneself
- Simplicity is key to creating stunning nail art designs
- There are many different types of nail art designs and techniques to explore
- Nail art ideas can be inspired by trendy manicure inspirations and creative nail designs
- With practice and patience, anyone can become a skilled nail artist
- Nail art is a great way to add a personal touch to your beauty routine
Getting Started with Basic Nail Art Essentials
To start exploring unique nail art, you need the right tools and materials. As a beginner, it’s wise to invest in a few key techniques. You can find lots of inspiration online in tutorials and nail art communities.
For essential tools, you’ll need good quality nail polish, brushes, and dotting tools. Preparation is key for a flawless finish. Here’s a list of must-have polish colors and finishes to get you started:
- Base coat
- Top coat
- Neutral shades (beige, white, black)
- Bright colors (red, pink, blue)
- Glitter and metallic finishes
A well-prepared nail surface is vital for long-lasting nail art. Here’s a checklist of materials needed to prepare your nails:
| Material | Description |
|---|---|
| Nail cleanser | Removes oils and residue from the nail surface |
| Nail file | Shapes and smooths the nail edge |
| Buffer | Gently buffs the nail surface for a smooth finish |
By following these basic steps and investing in the right tools and materials, you’ll be well on your way to creating stunning nail art designs. These designs will showcase your unique nail art concepts and stylish techniques, inspired by innovative nail art inspiration.
Preparing Your Nails for Perfect Art Application
To get a stunning nail art design, you need to prepare your nails right. As someone who loves nail art, I know a solid base is key for a finish that lasts. For DIY nail art, the right start is essential for a design that looks pro.
Before you start your nail art, clean and shape your nails. This makes your surface smooth and even for your design. Use a nail file to shape and a lint-free wipe to remove oils or residue. Here’s a detailed guide:
- Cleanse your nails with a nail cleanser
- Shape your nails to your desired shape
- Apply a base coat to protect your nails
For nail art trends, a good base coat is a must. It makes your surface smooth and prevents stains. You can pick from clear, strengthening, or growth-promoting base coats. For DIY ideas, clear is best for a sleek look.

By following these steps, you can make a beautiful nail art design that lasts. Always use a base and top coat to protect your nails and extend your design’s life. With practice and patience, you’ll make nail art that will impress everyone.
| Nail Art Tip | Description |
|---|---|
| Use a base coat | Helps to create a smooth surface and prevents staining |
| Choose a good top coat | Helps to seal in your design and make it last longer |
Simple Yet Stunning Nail Art Ideas for Beginners
Starting with simple yet stunning nail art ideas is key for beginners. It helps build confidence and skills. Here, I’ll share cute nail art designs great for newbies.
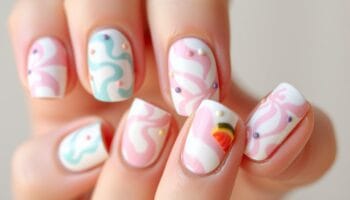
I enjoy trying out different nail art ideas. Some of the most beautiful designs are the simplest. For instance, minimalist line designs can make any nail look elegant. You can use a nail art brush and steady hand to paint thin lines in various patterns.
Exploring Nail Art Techniques
Other simple yet stunning nail art ideas for beginners include:
- Polka dot patterns, which can be made using a dotting tool or a toothpick
- Color block techniques, which involve painting blocks of color for a geometric pattern
- Gradient effects, which are achieved by layering different shades of polish
These creative nail designs are easy to make and offer lots of room for experimentation. With practice, you can master these techniques and create your own unique nail art.
Mastering Essential Nail Art Techniques
To master nail design, you need to know the basics of trendy manicure inspirations and stylish nail art techniques. I’ve learned that practice and patience are vital for stunning results. With the right tools and materials, anyone can make beautiful nail art that shows their style.
Key techniques include making clean lines, smooth curves, and detailed designs. You can use brushes, dotting tools, and stampers for this. For instance, a brush helps with sharp lines and curves. A dotting tool adds small details and patterns.
Here are some tips to get you started:
- Choose the right nail polish colors and finishes to match your desired design
- Use a base coat to protect your nails and promote polish adhesion
- Experiment with different tools and materials to achieve unique effects

By mastering these techniques and keeping up with new trendy manicure inspirations and stylish nail art techniques, you can create amazing nail art. It doesn’t matter if you’re new or experienced. Success comes from practice, patience, and a willingness to try new things.
Trending Minimalist Design Inspirations
I’m excited to share the latest nail art trends with you. These designs are perfect for those who love simplicity and elegance. They’re sure to impress.
Popular designs include geometric patterns, natural and nude looks, and metallic accents. You can use stamping, stenciling, or freehand painting to create these looks. For a subtle look, try using a light hand or a sheer finish.
Geometric Patterns
Geometric patterns add visual interest without being too bold. Mix shapes and colors for a unique look. Use striping tape for clean lines or a brush for a free-form look.
Natural and Nude Looks
Natural and nude looks are great for a subtle design. Use earthy tones like beige, brown, or taupe. Add shading or texture for depth and dimension.

Metallic Accents
Metallic accents add glamour to your nails. Use metallic polish or add metallic accents with a brush. Glitter or rhinestones can add extra sparkle.
Some popular tools for these designs include:
- Nail polish in various colors and finishes
- Stamping plates and stencils
- Nail art brushes in different sizes and shapes
- Striping tape and guides
By using these minimalist designs, you’ll stay current with nail art trends. These ideas are great for both beginners and pros, helping you create stylish and unique looks.
| Design | Technique | Tools Needed |
|---|---|---|
| Geometric Patterns | Stamping, stenciling, or freehand painting | Stamping plates, stencils, nail art brushes |
| Natural and Nude Looks | Freehand painting or shading | Nail polish, nail art brushes |
| Metallic Accents | Applying metallic polish or accents | Metallic polish, nail art brushes, glitter or rhinestones |
Advanced Creative Nail Designs for Special Occasions
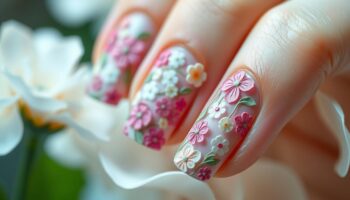
Exploring advanced creative nail designs is exciting. I’m eager to share unique nail art ideas that can boost your style for big events. Whether it’s a wedding, holiday, or party, the right nail art can really enhance your look.
Creating detailed designs requires the right tools and materials. My top picks include nail art brushes, dotting tools, and stampers. These tools help you craft everything from delicate flowers to bold shapes.
Here are some tips for a professional finish:
- Use a base coat to protect your nails and help polish stick
- Choose polish that’s rich in color and smooth to apply
- Finish with a top coat to seal your design and add shine
For big events, think about using 3D nail art or nail charms. They add elegance and sophistication. With practice, you can master these techniques and create designs that wow everyone.
The secret to advanced nail designs is to have fun and try new things. Don’t worry about mistakes – they can spark new ideas. With these tips and practice, you’ll create unique nail art that stands out at any event.
Maintenance Tips for Long-Lasting Nail Art
To keep your diy nail art ideas looking fresh, follow a few simple tips. Applying a protective top coat is key. It seals in your design and prevents chipping. This keeps your nail art looking salon-fresh for longer.
Here are some daily care routines to follow:
- Avoid harsh chemicals or detergents that can damage your nails or strip away the polish.
- Wear gloves when washing dishes, gardening, or doing activities that expose your hands to water or harsh substances.
- Moisturize your cuticles and hands regularly to keep them hydrated and healthy.
It’s also important to know how to touch up your nail art designs when they chip or fade. Apply a small amount of polish to the affected area and blend it in. By following these tips, you can enjoy your diy nail art ideas for weeks.
Remember, with practice and patience, you can create stunning nail art designs. So, don’t be afraid to try different diy nail art ideas and techniques. Have fun creating your own unique cute nail art designs.
| Nail Art Maintenance Tips | Benefits |
|---|---|
| Apply protective top coat | Prevents chipping and extends polish life |
| Follow daily care routines | Keeps nails and cuticles healthy and hydrated |
| Touch up designs as needed | Keeps nail art looking fresh and vibrant |
Conclusion: Elevating Your Nail Art Journey
As we wrap up our nail art journey, I hope you’re feeling inspired. Whether you’re new to creative nail designs or an experienced artist, this article has given you a solid start. You now have the tools to take your manicure to new levels.
Nail art is all about showing off your unique style and personality. Don’t be shy to try new things. Keep up with trends by following nail art influencers, attending workshops, or joining online groups. With practice and a love for learning, you’ll create nail art that will make everyone stare.
So, let’s celebrate the endless possibilities ahead in your nail art journey. Cheers to your creativity and the stunning nails you’ll make! May your nails always be the center of attention.
FAQ
What are the essential tools for nail art success?
For nail art success, you need nail polish, brushes, dotting tools, and tape. Also, a good base and top coat are key. The right tools help create professional nail art.
What are some must-have polish colors and finishes for nail art?
Essential colors include black, white, and nude, plus fun colors like red and blue. Mix creams, metallics, and glitters for depth in your designs.
How do I prepare my nails for perfect nail art application?
Start by trimming, filing, and buffing your nails. Use a dehydrator and primer for better adhesion. Apply a base coat for a smooth canvas.
What are some simple yet stunning nail art ideas for beginners?
Beginners can try line designs, polka dots, color blocks, and gradients. These designs are easy to customize with different colors and patterns.
What are the essential techniques for mastering nail art?
Mastering nail art requires clean lines, smooth curves, and details. Use brushes, dotting tools, and stampers for a professional finish. Practice and experiment to find your best techniques.
What are the latest trending minimalist design inspirations for nail art?
Current trends include geometric patterns, natural looks, and metallic accents. These designs are modern and versatile, perfect for everyday or special occasions.
How can I create advanced creative nail designs for special occasions?
For special occasions, learn essential techniques and experiment with tools and materials. Try floral designs, 3D embellishments, and complex patterns for a standout look.
How can I maintain my nail art for long-lasting wear?
Apply a protective top coat and follow a daily care routine. Moisturize and file your nails regularly. Touch up chips and use the right remover to keep your designs looking fresh.

Seja o primeiro a comentar!