

Master Nail Painting Techniques for Professional Results
Compartilhe agora mesmo:
Nail painting isn’t just a beauty routine; it’s an art form that anyone can master with the right techniques and tools. Whether you’re a beginner or a seasoned pro, there’s always something new to learn in the world of nail painting. From choosing the right brushes to mastering advanced designs, this guide will walk you through everything you need to know to achieve professional results. Let’s dive into the colorful world of nail painting techniques and unlock your inner artist.
Key Takeaways
- Selecting the right tools and high-quality nail polish is crucial for professional-looking nails.
- Advanced techniques like water marble and 3D designs can elevate your nail art game.
- Proper nail preparation and finishing touches are key to a long-lasting manicure.
- Incorporating artistic elements like stamping and freehand designs can create unique styles.
- Regular maintenance and care ensure your nail art stays fresh and chip-free.
Essential Tools for Mastering Nail Painting Techniques
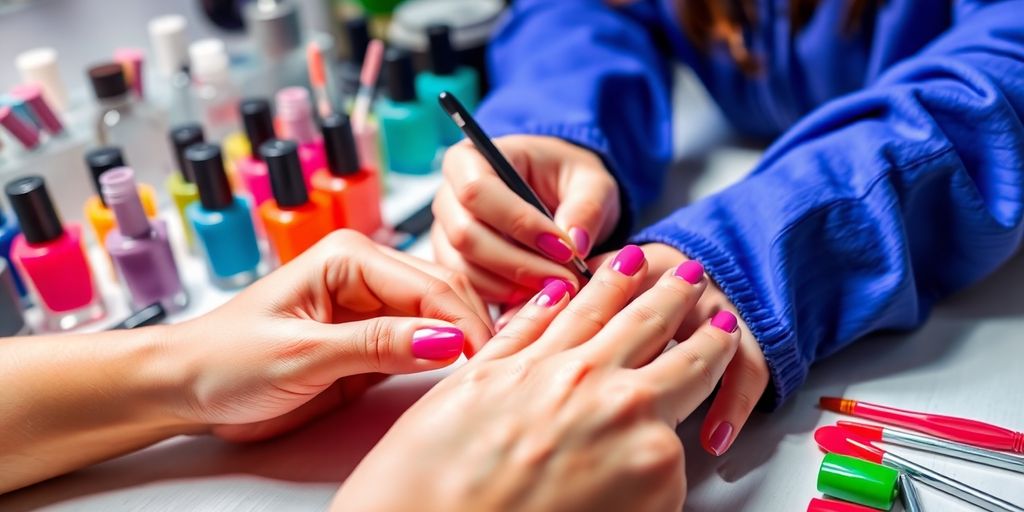
Choosing the Right Brushes and Tools
When it comes to nailing the art of nail painting, having the right brushes and tools is a game-changer. Whether you’re a pro or just starting out, a set of high-quality brushes is essential. Investing in a variety of brushes, from fine detail brushes to flat and angled ones, allows you to create everything from intricate designs to broader strokes. Don’t overlook the importance of dotting tools for perfect circles and striping tape for those sharp, clean lines. And let’s not forget the essentials like cuticle pushers and nail clippers to keep your canvas neat.
Importance of High-Quality Nail Polish
High-quality nail polish isn’t just about vibrant colors; it’s about durability and finish. A good polish can transform your nail art from amateur to professional. Look for polishes that offer a smooth application and long-lasting wear. A strong base coat is crucial for protecting your nails and providing a smooth surface for the polish. Meanwhile, a top coat seals your design, adding a glossy finish and extending the life of your manicure.
Using Base and Top Coats Effectively
Base and top coats are your secret weapons for a flawless manicure. Start with a base coat to create a smooth foundation and prevent staining. Once your nail art is complete, apply a top coat to protect your design and add shine. This simple step is key to preventing chips and maintaining your nail art’s vibrancy. Remember, patience is key—let each layer dry completely before moving to the next.
Mastering the basics of nail painting sets the stage for more advanced techniques. With the right tools and a little practice, you can achieve salon-quality results right at home.
Exploring Advanced Nail Painting Techniques
Understanding Water Marble Art
Water marble art is like magic for your nails. Imagine swirling colors that look like a mini masterpiece on each nail. Start by filling a cup with room-temperature water. Drop in different colors of polish, one at a time, letting each spread across the water’s surface. Use a toothpick to create patterns in the floating polish. When you’re happy with your design, dip your nail into the water at an angle. Clean away the excess polish with a toothpick before pulling your nail out. It’s a bit messy, so taping around your nail can help keep things tidy. Remember, patience is key; not every attempt will be perfect, but practice makes beautiful.
Creating Stunning Ombre Effects
Ombre nails are all about that seamless blend of colors. Begin with a base color and let it dry completely. Grab a sponge—either a makeup sponge or a special nail sponge works. Paint your chosen colors in stripes on the sponge, then dab it lightly onto your nail, moving from the tip to the base. Keep dabbing to blend the colors together. It’s best to apply several thin layers for a smoother gradient. Finish with a top coat to add shine and further blend the colors.
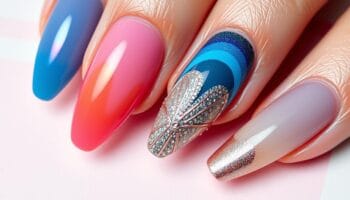
Mastering 3D Nail Art Designs
3D nail art is where your nails truly pop. Using elements like gems and acrylic shapes, you can create designs that literally stand out. Start with a simple base color. While it’s still tacky, place your 3D elements using tweezers or a nail art picker. For sculpted designs, use a small brush and 3D gels or acrylics to build shapes directly onto the nail. A UV or LED lamp will be necessary to cure these designs. To ensure they last, avoid snagging your nails on clothing or objects, and always apply a strong top coat to secure the design.
Advanced techniques like these transform nail painting from a simple beauty routine into an art form. Each method offers a unique way to express creativity and style, making your nails the perfect canvas for innovation.
Step-by-Step Guide to Perfect Nail Painting
Preparing Your Nails for Painting
Before you even think about opening that bottle of polish, you gotta prep your nails. Start by removing any old polish with a gentle remover. Next, clip and file your nails to your desired shape. Buff the surface lightly to remove ridges and create a smooth canvas. Don’t forget to push back your cuticles gently. This whole prep thing is crucial for a neat finish. And hey, if you want to go all out, a little hand soak and some cuticle oil will do wonders.
Applying Nail Polish Like a Pro
Now, for the fun part—painting! Begin with a base coat to protect your nails and make the color last longer. When it’s dry, apply the polish in thin layers. Three strokes should do it: one down the middle and one on each side. Let each layer dry before adding another, and don’t rush it. If you mess up, a cotton swab dipped in remover can clean up the edges. Patience is key here—good things take time!
Finishing Touches for a Professional Look
Once your color is on and dry, it’s time to seal the deal with a top coat. This not only gives a glossy finish but also helps prevent chipping. If you’re feeling fancy, you can add some nail art or embellishments. Just make sure everything’s set before you go about your day. Finally, a little hand cream will keep your skin soft and your manicure looking fresh. Remember, your nails are like tiny canvases—treat them with care!
Incorporating Artistry into Nail Painting
Freehand Designs for Unique Styles
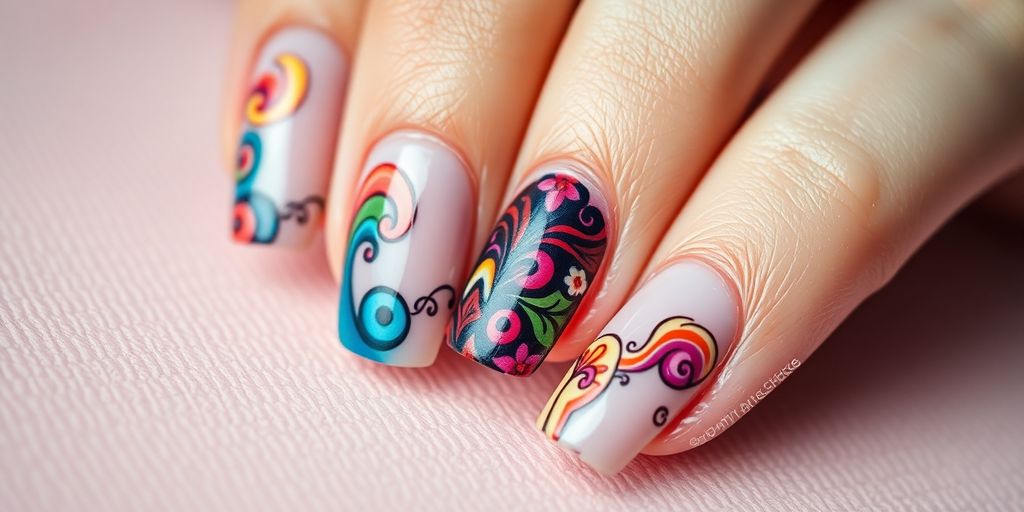
Freehand designs are your chance to let creativity flow directly from your mind to your nails. With a fine brush and some patience, you can paint anything from simple stripes to intricate floral patterns. The key is to start simple and gradually work your way up to more complex designs. Don’t worry if your first few attempts aren’t perfect; practice really does make perfect. Try experimenting with different colors and patterns to see what works best for you. This technique is perfect for those who want their nails to be a unique expression of their personal style.
Using Stamping for Intricate Patterns
Stamping is an awesome way to get detailed designs without the hand cramps of freehand painting. You’ll need a stamping kit, which includes engraved plates and a special polish. Here’s the process: apply the polish to the plate, scrape off the excess, and use a rubber stamp to transfer the design onto your nail. It’s like having a tiny art studio at your fingertips. This method is quick and ensures consistent results, making it ideal for both beginners and seasoned nail artists.
Adding Embellishments for Extra Flair
For those who love a bit of bling, adding embellishments like rhinestones, studs, or glitter can take your nail art to the next level. Use a wax pencil for precise placement, and secure everything with high-quality nail glue. Embellishments can be subtle or bold, depending on your mood and style. Just remember, with great sparkle comes great responsibility—avoid snagging your nails on clothing or objects to keep your design intact. This technique is perfect for special occasions or when you just want to feel a little extra glamorous.
Nail art isn’t just about looking good. It’s a form of creative expression that can also be a relaxing and mindful activity. Whether you’re painting freehand or adding embellishments, take the time to enjoy the process and let your nails tell your story.
Maintaining Your Nail Art for Long-Lasting Results
Tips for Preventing Chipping and Peeling
Keeping your nail art fresh and intact can be a challenge, but it’s definitely doable with a few simple tricks. Start by ensuring your nails are clean and dry before applying any polish. Oils and moisture can interfere with adhesion, leading to chips and peels. Consider using a high-quality base coat, as it provides a smooth surface and improves polish adherence. Regularly applying a top coat every couple of days can also help maintain the shine and durability of your nail art.
Proper Nail Care Between Paintings
Taking care of your nails between manicures is just as important as the painting itself. Moisturize your cuticles daily with a nourishing oil to keep them healthy and prevent dryness. When your nails are bare, give them a break from polish every now and then to let them breathe. Trim and file them regularly to avoid breakage and maintain a neat appearance.
Reapplying Top Coats for Durability
A top coat isn’t just for the final touch; it’s a vital part of maintaining your nail art. Reapplying a top coat every few days can significantly extend the life of your manicure. This extra layer acts as a shield against daily wear and tear. When applying, make sure to seal the edges of your nails to prevent water from seeping in, which can lift the polish. Remember, a good top coat not only protects but also enhances the vibrancy of your nail colors.
Keep in mind, the secret to a long-lasting manicure isn’t just about the products you use but also how you care for your nails every day. Consistent maintenance and protection are key to enjoying beautiful nails for longer.
Trends in Nail Painting Techniques
Popular Colors and Styles for the Season
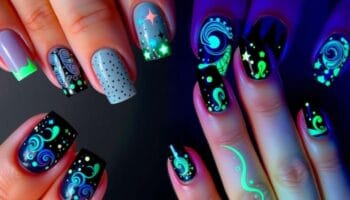
Each year brings fresh nail styles and colors that capture the essence of the season. This year, expect to see a lot of pastels and muted tones, which are perfect for a subtle, yet classy look. On the other hand, bold colors like electric blue and neon green are making a splash for those who love to stand out. Cat-eye polish, known for its mesmerizing shimmer, is also gaining popularity, adding a touch of mystery to your nails.
Innovative Techniques to Try
Nail art is always evolving, and this year is no exception. Among the top trending nail designs are 3D textures that give your nails a unique, tactile feel. Chrome French manicures are also trending, offering a modern twist on a classic look. For those who love patterns, water marble techniques are still in vogue, allowing for one-of-a-kind designs with every dip.
Celebrity-Inspired Nail Art Ideas
Celebrities continue to influence nail art trends with their bold and creative designs. This year, many stars are opting for intricate nail art that incorporates metallic finishes and holographic elements. These designs not only reflect light beautifully but also make a statement. Whether it’s a simple metallic stripe or a full holographic nail, these styles are perfect for those looking to add a bit of glam to their everyday look.
Nail art is more than just a beauty trend; it’s a form of self-expression. With so many styles and techniques to choose from, there’s something for everyone. Whether you’re into the latest celebrity-inspired looks or prefer to create your own unique designs, the world of nail art is full of possibilities.
Wrapping It Up
So there you have it, a whole bunch of ways to make your nails look like they just walked out of a salon. Whether you’re into the subtle elegance of ombre or the bold statement of 3D art, there’s something for everyone. Remember, practice makes perfect, so don’t be afraid to try new things and mess up a little. It’s all part of the fun! Keep your tools handy, your creativity flowing, and soon enough, you’ll be the go-to nail artist among your friends. Happy painting!
Frequently Asked Questions
What tools do I need for nail art?
You’ll need brushes, dotting tools, a base coat, a top coat, and some nail polish colors. Rhinestones and striping tape are also handy for cool designs.
How can I make my nail polish last longer?
Start with clean nails, use a base coat, apply thin layers of polish, and finish with a top coat. Avoid soaking your hands in water for too long.
What’s the best way to do ombre nails?
Paint your nails with a base color, let it dry, then use a sponge to dab on other colors. Blend them gently to create a gradient effect.
How do I remove 3D nail art?
Soak your nails in acetone for a few minutes, then gently use a nail file to remove the 3D elements. Be careful not to damage your natural nails.
Can I do nail art at home?
Yes, with some practice and the right tools, you can create beautiful designs at home. Start with simple patterns and work your way up to more complex art.
What should I do if my nail polish chips?
If your nail polish chips, you can touch it up with the same color. Apply a thin layer and seal it with a top coat to blend it in.
Seja o primeiro a comentar!