

French Tip Toe Nail Art: My Manicure Experience
Compartilhe agora mesmo:
So, I decided to give the French pedicure a try. Honestly, I was a bit nervous at first. I mean, who wouldn’t be? The idea of painting tiny lines on my toes seemed daunting. But, I was curious and ready for the challenge. I wanted to see if I could pull off those fancy designs I always admired. Turns out, it was quite the adventure. From picking out the right colors to mastering the technique, it was a journey full of twists and turns. And now, I’m here to share what I learned along the way.
Key Takeaways
- French pedicures can be both classic and modern, offering a range of styles to choose from.
- Choosing the right color combination is key to achieving the desired look.
- Mastering the technique takes practice, but it’s worth it for the polished result.
- There are many creative variations, like adding glitter or metallic accents.
- Maintaining your pedicure helps keep it looking fresh and stylish for longer.
Exploring the Art of French Pedicure Designs

Traditional French Pedicure Techniques
When I first dipped my toes into the world of French pedicures, I was drawn to the classic and timeless look of the traditional style. This involves a soft pink or nude base with a stark white tip, creating a clean and sophisticated look. The simplicity of this design is what makes it so appealing. To achieve this, start by prepping your nails, making sure they’re clean and shaped. Then, apply a base coat to protect your nails from staining. Once dry, paint the entire nail with a pale pink or nude polish. The challenge comes with the white tip—steady hands are a must! I found using nail guides or tape to be a lifesaver for achieving those perfect, crisp lines.
Modern Twists on Classic French Tips
Who says French pedicures have to be boring? Nowadays, there are so many fun twists on the classic design. You can play around with colors—think black tips on a nude base or even a rainbow of colors. Metallics are another trendy option, adding a bit of glam to your toes. I’ve also tried adding tiny rhinestones along the line where the tip meets the base, giving it a bit of sparkle. It’s amazing how a small change can make such a big difference!
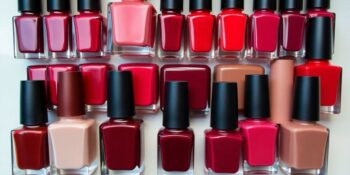
Choosing the Right Colors for Your Style
Picking the right colors can be a daunting task, but it’s all about what makes you feel good. If you’re like me and love a classic look, stick with the traditional pink and white. But if you’re feeling adventurous, why not try something bold? A deep red or even a pastel blue can make your toes pop. Here’s a little trick: match your pedicure to your outfit or even your mood. It’s a fun way to express yourself and keep things fresh.
French pedicures are more than just a beauty treatment—they’re a form of self-expression. Whether you stick to tradition or venture into modern styles, the choice is yours. Enjoy the process and let your creativity shine!
My Personal Journey with French Pedicure Nail Art

Initial Impressions and Expectations
So, I decided to try my hand (or foot, rather) at a French pedicure, and let me tell you, I was both excited and a bit nervous. The idea of having chic, well-groomed feet was super appealing, but I wasn’t sure I could pull it off myself. I imagined myself walking around with perfectly manicured toes, feeling like I just stepped out of a salon. But then, reality kicked in. Was it going to be as simple as it looked in those tutorials? Spoiler: not quite.
Challenges and Learning Curves
Alright, let’s talk about the struggles. First off, getting that crisp white line on the tips was way harder than I thought. My hands aren’t the steadiest, and I ended up with more of a zigzag than a straight line. A few tries later, and I was ready to throw in the towel. But persistence paid off. I learned that using tape as a guide made a world of difference. Also, choosing the right nail polish consistency was crucial. Too thick, and it was a gloopy mess; too thin, and it needed a million coats.
The Final Outcome and Satisfaction
After what felt like a mini-marathon of painting, correcting, and repainting, I finally got there. My toes looked pretty darn good, if I do say so myself. Sure, they weren’t salon-perfect, but they had character. I even tried a colorful French manicure design that added a fun twist to the classic look. The satisfaction of doing it myself was immense. I realized that with a bit of patience and practice, I could have stylish feet without the salon price tag.
Trying out a French pedicure was a journey of trial and error, but the end result was worth every smudge and redo. Now, I walk with a little more pep in my step, knowing I did it on my own.
Tips for Achieving the Perfect French Pedicure
Essential Tools and Products
Alright, let’s dive into the basics. To get that perfect French pedicure, you’ll need a few tools and products. Here’s what I always keep handy:
- Nail Clippers and Files: These are essential for shaping your nails to your desired length and smoothness.
- Cuticle Pusher and Trimmer: Because nobody wants messy cuticles, right? Keep them neat for a clean look.
- Base Coat, Nail Polish (your choice of color), and Top Coat: These are the holy trinity of nail polish application. The base coat protects, the color shows off your style, and the top coat seals the deal.
Step-by-Step Guide to Flawless Application
Getting a French pedicure isn’t rocket science, but a little guidance never hurts. Here’s how I do it:
- Prep Your Nails: Start by trimming and filing your nails. Push back those cuticles too.
- Apply Base Coat: This is crucial for a smooth finish and to protect your nails.
- Paint Your Nails: Use a neutral or light pink polish for the base. Let it dry completely.
- Create the French Tip: Use white polish to paint the tip of your nails. You can use tape for a straight line if you’re not steady-handed.
- Seal with Top Coat: Finish off with a top coat to add shine and durability.
Common Mistakes to Avoid
Even the best of us slip up sometimes. Here are a few common mistakes and how to avoid them:
- Skipping the base coat: Seriously, don’t. It helps your polish last longer.
- Rushing the drying process: Let each layer dry completely before moving to the next. Patience is key.
- Uneven tips: If your hand isn’t steady, use a guide or tape to keep those lines straight.
Remember, achieving the perfect French pedicure is all about patience and practice. Don’t rush, and enjoy the process. Your feet will thank you!
For more creative nail art ideas, check out explore técnicas e dicas para criar unhas decoradas.
Creative Variations of French Pedicure Designs
Incorporating Metallic and Glitter Accents
Adding a bit of sparkle to your French pedicure can really make your toes pop. I love using metallic polishes for the tips. It gives a chic and modern look without being too over the top. Sometimes, I even mix in some glitter accents. This combo is perfect for a night out or a special event. You can apply a thin line of metallic polish just at the edge or go bold with a full glitter tip. The trick is to balance it with a neutral base so it doesn’t look too busy.
Experimenting with Bold and Pastel Colors
Who says French tips have to be white? I’ve tried everything from bold reds to soft pastels, and they all have their own charm. Pastels are great for spring and summer, while bold colors can make a statement any time of year. Here’s a little list of combos I’ve tried:
- Bold Red Tips: Paired with a nude base, this is a classic yet daring look.
- Pastel Pink and Blue: Perfect for a soft, dreamy vibe.
- Black Tips: Super edgy and modern, especially with a matte finish.
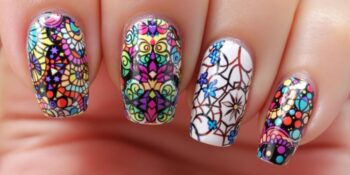
Adding Unique Patterns and Textures
Patterns and textures can take your French pedicure to the next level. I’ve played around with stripes, polka dots, and even some floral designs. Textures like matte or velvet finishes are also fun to experiment with. One time, I used a dotting tool to create tiny polka dots on the tips, and I was surprised at how cute it turned out! For textures, a matte top coat can completely change the look and feel of your pedicure.
Playing with different designs on my toes has been a fun way to express my creativity. It’s amazing how such a small canvas can offer so many possibilities.
Maintaining Your French Pedicure for Longevity

Daily Care and Maintenance Tips
Keeping that French pedicure looking fresh isn’t just about the initial application. Consistency in care is key. Every day, I make sure to moisturize my feet, focusing on the cuticles and nails. This helps in keeping the skin soft and preventing any dryness that might chip the polish. Also, avoid walking barefoot in places where your nails might get damaged.
When to Refresh or Redo Your Pedicure
Typically, I find that redoing my pedicure every two weeks works best. If you’re using vibrant colors or intricate designs, you might need to touch up sooner. Look for signs like chipping or dullness, and don’t hesitate to refresh when needed. Remember, a quick touch-up can make a huge difference.
Products to Enhance Durability and Shine
Using the right products can seriously extend the life of your pedicure. I swear by a good quality top coat; reapplying every few days keeps the shine and protects the polish. Plus, using a cuticle oil daily can prevent any lifting or peeling at the edges. If you’re interested in trying something new, Dolla Nails Pro’s products offer some fantastic options for maintaining that salon-fresh look. They have a range of top coats and nail treatments that can help keep your pedicure looking pristine for longer.
The Impact of French Pedicure on Personal Style

Boosting Confidence with Well-Groomed Feet
There’s something about having a fresh French pedicure that just makes me feel unstoppable. It’s like my feet are ready to take on the world, one step at a time. When my toes are perfectly polished, I feel more put-together, even on days when I’m just lounging at home. It’s amazing how such a small detail can boost my confidence and make me walk a little taller.
Complementing Outfits with Nail Art
Matching my pedicure with my outfit is like the cherry on top of a sundae. Whether I’m going for a casual look with jeans and a tee or dressing up for a night out, my French pedicure ties everything together. I love experimenting with different shades and styles to see what works best with my wardrobe. It’s like having a secret accessory that only I know about.
Expressing Individuality Through Design Choices
Choosing the design of my French pedicure is a fun way to showcase my individuality. I can go classic with the traditional white tips or mix it up with bold colors and patterns. Sometimes, I even add a little sparkle or a unique design to make it truly mine. It’s my little way of expressing who I am and what I love, all through the art on my toes.
A French pedicure isn’t just about looking good; it’s about feeling good too. It’s a form of self-expression that reflects my personality and style. Every time I look down at my toes, I’m reminded of the care and creativity I’ve put into my appearance, and that makes me smile.
A French pedicure can really change how you look and feel. It adds a touch of elegance to your style, making your feet look neat and polished. If you want to learn more about how to elevate your personal style with nail art, visit our website for tips and tricks!
Wrapping Up My French Pedicure Adventure
So, there you have it, my little journey into the world of French pedicures. Honestly, I thought it would be a breeze, but it turned out to be a bit of a challenge. Those neat white tips? Not as easy as they look, especially when you’re trying to get them just right. But hey, practice makes perfect, right? I tried a few different styles, from the classic white to some fun colors, and even a bit of sparkle. Each one had its own vibe, and I loved how they added a little flair to my everyday look. If you’re thinking about trying it out, go for it! It’s a fun way to express yourself and add a touch of elegance to your feet. Just remember, it’s all about having fun and finding what makes you feel good. Until next time, happy painting!
Frequently Asked Questions
What is a French pedicure?
A French pedicure is a type of nail art where the toenails are painted with a natural pink or nude base and topped with a white tip. It’s a classic look that is both elegant and versatile.
How do you do a French pedicure at home?
To do a French pedicure at home, start by trimming and filing your nails, then apply a base coat. Paint the tips white, and once dry, apply a pink or nude polish over the entire nail. Finish with a top coat for shine and durability.
What are some modern variations of the French pedicure?
Modern variations include using different colors for the tips, such as metallic or pastel shades. You can also add glitter, patterns, or even small decals for a unique twist.
How long does a French pedicure last?
A French pedicure typically lasts about two weeks if properly cared for. Using a top coat every few days can help maintain its appearance.
What colors can I use for a French pedicure?
While white is traditional for the tips, you can experiment with colors like blue, pink, gold, or even black for a more modern look.
How can I make my French pedicure last longer?
To extend the life of your French pedicure, apply a clear top coat every couple of days, avoid exposing your feet to harsh chemicals, and moisturize regularly to keep your skin and nails healthy.

Seja o primeiro a comentar!