
Easy Nail Art Tutorials: Step-by-Step Designs for Beginners
Compartilhe agora mesmo:
Are you tired of spending a lot on salon manicures but want creative nail art? Look no further! This guide shares 11 easy nail art tutorials. You’ll have salon-quality nails in no time. From simple dotting tool techniques to detailed gradient designs, these steps are perfect for beginners.

Whether you’re a busy mom, a college student on a budget, or someone who loves to be creative, these tutorials are for you. Expert tips from Jordan Meade, Amy Oung, and Tammy Taylor will help you. You can make popular designs like micro French tips, mismatched nails, and squiggly lines with basic tools and techniques.
Key Takeaways
- Discover 11 easy-to-follow nail art tutorials for beginners
- Learn from professional nail artists’ expert tips and tricks
- Create salon-worthy designs using affordable, accessible materials
- Explore a variety of techniques, from dotting to gradients
- Unleash your creativity with unique, customizable nail art
Essential Tools and Materials for Beginner Nail Artists
Starting as a nail artist means having the right tools and materials. You’ll need basic nail art tools and essential nail polish colors. Let’s look at what every beginner should have.
Basic Nail Art Tools Every Beginner Needs
- Dotting tools: These versatile tools allow you to create a variety of dot patterns and textures on your nails.
- Small, firm brushes: Ideal for creating precise lines and shapes.
- Nail tape: Use this to create clean, geometric designs and patterns on your nails.
- Makeup sponges: Great for creating gradient effects and ombré nail art.
Must-Have Nail Polish Colors and Finishes
Having a wide range of nail polish colors and finishes is key. Some essential shades for beginners include:
- Black: A classic hue that serves as the perfect canvas for various nail art designs.
- Blue, purple, and silver: These colors work wonderfully for creating galaxy-inspired nails.
- Gold polish and glitter: Add a touch of glamour and sparkle to your nails.
Preparation Materials for Perfect Application
Before starting your nail art, prepare with the right materials. You’ll need:
- Base coats: These help the nail polish adhere to your nails and prevent staining.
- Top coats: Seal in your nail art designs with a high-quality top coat for a long-lasting, glossy finish.
- Nail guides: Use these stencils to create clean, defined lines and shapes during the application process.
With these tools and materials, you’re ready to start creating stunning nail art. Remember, practice and experimentation are key to mastering nail artistry.
Getting Started: Nail Preparation Techniques
Proper nail preparation is key to stunning nail art. Whether you’re new or experienced, learning the basics can greatly improve your results. Let’s explore the essential steps to prepare your nails for your next masterpiece.
Cleanse and Shape
Begin by cleaning your nails to remove dirt, oils, and residue. Use a gentle cleanser or rubbing alcohol for a clean start. Then, shape your nails with a file or clippers. Try different shapes like round, square, or almond to find what works best for you.
Cuticle Care
Caring for your cuticles is vital for great nail art. Use a pusher or nipper to gently remove excess skin. Apply cuticle oil or cream to soften and prepare your cuticles for nail art.
Buffing and Prepping
Buff your nails lightly with a fine-grit buffer for a smooth surface. This step helps polish stick better and lasts longer. If using gel or acrylic, follow the product’s dehydrating and priming steps for best results.
Mastering these nail prep techniques will help you create stunning nail art. Remember, proper prep leads to a flawless, lasting manicure. Enjoy your nail art journey!
| Nail Preparation Technique | Benefits |
|---|---|
| Cleansing and Shaping | Removes dirt, oils, and residue for a clean canvas; Allows for personal nail shape preference |
| Cuticle Care | Softens and conditions cuticles to prepare for nail art application |
| Buffing and Prepping | Creates a smooth, even surface for better polish adhesion and longer-lasting nail art |

“Proper nail preparation is the key to unlocking your nail art. Take the time to get it right, and your designs will shine brighter than ever before.”
The secret to great nail art step by step and manicure techniques is in the prep. By following these steps, you’ll create a flawless, long-lasting nail art step by step masterpiece. Happy painting!
Nail Art Tutorials: Simple Designs for Beginners
Start your nail art journey with these easy tutorials. They’re perfect for both DIY experts and beginners. You’ll learn simple yet beautiful techniques, from dotting tools to flower designs.
Dotting Tool Techniques
The dotting tool is a great tool for nail art. It helps you make dots of different sizes and patterns. Begin with a clean nail and let your creativity run wild. Try making dots in patterns or just letting them flow.
Basic Line and Stripe Patterns
Make your nails stand out with line and stripe designs. Use nail tape or a thin brush for clean lines. Try different colors and widths for a sophisticated look. These designs are easy to start with and can be made your own.
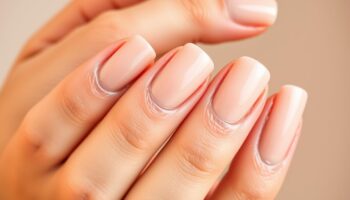
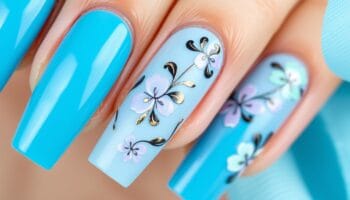
Simple Flower Designs
Add a natural touch to your nails with flower designs. Start with a five-dot “star” for the flower center. Then, use a dotting tool or brush to create the petals. Play with colors and shapes to make your own flowers.
Enjoy the fun of nail art with these easy techniques. Remember, practice makes perfect. So, don’t be shy to try new things and show off your creativity. Happy painting!

Mastering the Dotting Tool: Basic Patterns
Learning to use the dotting tool is key for making stunning nail art. It’s all about controlling dot size, spacing, and creating patterns. When you dip the tool in polish, keep it straight up and down. This ensures your dots are clean and precise.
To get better, start with rows of dots, each one a bit smaller than the last. This helps you get a steady hand and control dot size. For flowers, arrange dots in a star pattern to make petals. Try dragging dots to shape petals or even hearts. Rotating the tool helps keep dots the same size and spaced evenly.
With practice, the dotting tool will be a must-have for your nail art. It lets you make many detailed and beautiful patterns. The secret to getting good at it is patience, trying new things, and always looking to improve your skills.
FAQ
What are some simple and budget-friendly nail art tutorials I can try at home?
Nail art tutorials are a great way to save money and have fun at home. Even if you’re new to nail art, you can make amazing designs with just a few tools. Experts like Jordan Meade, Amy Oung, and Tammy Taylor share their best tips for nail art at home.
Some popular designs include micro French tips, mismatched nails, and funky stickers. You can also try squiggly lines for a unique look.
What essential tools do I need to get started with nail art as a beginner?
As a beginner, you’ll need dotting tools, small brushes, nail tape, and makeup sponges. Don’t forget to have black, blue, purple, and silver polish for galaxy designs. Gold polish and glitter are also great for many designs.
Make sure to have base coats, top coats, and nail guides for clean lines. Nail charm kits and glitter nail foils can add a special touch to your designs.
How do I properly prepare my nails for nail art?
Getting your nails ready for nail art is key. Start by cleaning and shaping them. Apply a base coat to protect your nails and help the polish stick.
For designs like ombre, use tip guides or painter’s tape for clean lines. Practice basic techniques like making dots or dragging them to form shapes before trying harder designs.
What are some simple nail art designs for beginners to try?
Beginners can try dotting tool techniques, basic line and stripe patterns, and flower designs. For dotting, focus on making dots the same size and spacing them evenly. Use nail tape or thin brushes for lines and stripes.
Simple flower designs can be made with five dots in a star pattern. Try dragging dots to make heart shapes or swirly patterns.
How do I master the dotting tool technique?
Mastering the dotting tool takes practice in controlling dot size, spacing, and creating patterns. Hold the tool straight when dipping it in polish. Practice making rows of dots, with each dot slightly smaller than the last.
For flowers, arrange dots in a star pattern. Try dragging dots to create petal shapes or heart designs. Rotating the tool between dots helps keep dot sizes consistent.

Seja o primeiro a comentar!