

Creative Nail Art Designs to Elevate Your Manicure Game
Compartilhe agora mesmo:
Nail art is more than just a trend—it’s a way to express your personality and creativity. From simple designs to intricate masterpieces, there’s something for everyone. Whether you’re a fan of the classic French tip or love experimenting with bold colors and textures, nail art can transform a basic manicure into a stunning work of art. Let’s explore some exciting nail art designs that will inspire your next manicure.

Key Takeaways
- Nail art allows for personal expression and creativity.
- There are a variety of designs, from simple to complex.
- Modern French tips offer a twist on a classic look.
- Nature-inspired designs bring a whimsical touch.
- 3D and textured designs add depth and interest.
Modern French Tip Nail Art Designs
Colorful French Tips
If you’re bored with the traditional white tip, why not add a splash of color? Colorful French tips are a fun way to show off your personality. You can choose from neon pinks, deep blues, or even soft pastels for a more subtle look. This style keeps the classic French structure but adds a playful twist.
- Where to Wear: Perfect for summer outings or vacations.
- Pro Tip: Match your colorful tips with outfits or accessories for a coordinated look.
Diagonal French Tips
Diagonal French tips are a trendy twist on the classic style. By angling the tip, you create a dynamic look that stands out. This design is perfect if you want something modern but still subtle.
- Styling Idea: Use contrasting colors for the base and tip to make the diagonal line pop.
- Best For: Those who want a fresh take on a traditional manicure.
Heart-Shaped Tips
Add a touch of romance with heart-shaped tips. This design is sweet and perfect for special occasions like Valentine’s Day. It’s a creative way to express love through your manicure.
- How to Achieve: Use a thin brush to paint small heart shapes at the tip of each nail.
- Perfect For: Romantic dates or weddings.
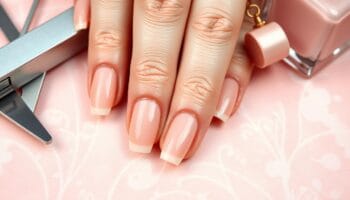
For those looking to explore more modern French manicure ideas, consider rounded micro French tips that combine elegance with a glossy pink finish, creating a chic and sophisticated look.
Geometric Nail Art Designs
Graphic Black and White
If you’re into a more classic look without too much fuss, graphic black and white nails might be your thing. This design is all about simplicity yet making a statement. Picture a clean white base with thin black stripes running down the center. This combo is super versatile and can match any outfit. You could even switch it up by adding a few stripes or dots here and there.
Metallic Pyramids
Ever thought of adding a little shimmer to your nails? Metallic pyramids might just do the trick. Start with a nude base, then add black tips and metallic triangles at the cuticles. The key here is patience—make sure your base color is completely dry before you start on the pyramids. A little tip: use a thin brush for precision.
Geometric Accents
For those who like a bit of flair without going overboard, geometric accents are perfect. Imagine a soft pink base with metallic purple triangles as accents. It’s subtle yet striking. You can play around with different shapes and colors to suit your mood. Just keep a steady hand and maybe some nail tape handy to get those sharp lines.
Geometric designs add a modern twist to any manicure, making your nails a canvas for creativity. Whether you go bold or keep it simple, these designs are sure to turn heads.
Nature-Inspired Nail Art Designs
’90s Daisies
Embrace a nostalgic vibe with ’90s daisies on your nails. These charming designs feature nude manicures adorned with bejeweled stickers in the shape of flowers. It’s a playful and simple way to add a touch of whimsy to your look.
- Start with a clean, nude base.
- Apply bejeweled daisy stickers to each nail.
- Seal with a top coat for extra shine and durability.
Smilie Faces
Bring a smile to your nails with cheerful smilie faces. These designs are perfect for those who love a fun and quirky look. You can mix and match colors to create a unique set of nails that truly stand out.
- Begin with a bright base color of your choice.
- Use a thin brush to paint small circles on each nail.
- Add a smile and two dots for eyes to complete the face.
Starry Details
If you’re dreaming of a night sky on your fingertips, starry details are the way to go. This design is simple yet striking, using nail stickers to achieve a precise look without the hassle.
- Apply an apricot or soft pastel base color.
- Place white star stickers randomly on each nail.
- Finish with a top coat to secure the stars and add a glossy finish.
Nature-inspired nail art brings a touch of the outdoors to your fingertips, allowing you to carry a piece of the natural world with you wherever you go. Whether it’s the simplicity of daisies or the whimsy of smilie faces, these designs offer a delightful escape from the ordinary.
For more simple yet captivating nail art designs, explore other styles like negative space and abstract designs to inspire your next manicure.
Minimalist Nail Art Designs
Minimalism in nail art is all about subtle elegance and simplicity. It’s perfect for those who want to keep their nails looking chic without too much fuss. Let’s explore some of the best minimalist nail art designs.
Metallic Lines
Adding a metallic line to your nails can give them a sleek and modern look. This design is super easy to achieve. Just paint your nails with a base color of your choice and let it dry. Then, using a striping brush, apply a thin metallic line down the center of each nail. This simple touch can transform your nails from plain to polished in no time.
Graphic Edge
If you’re looking to add a bit of edge to your minimalist nail art, try incorporating graphic elements. A thin black line or a small geometric shape can make a big impact. Use a fine brush to paint these details over a nude or pastel base. The contrast between the base and the graphic detail will make your nails stand out while still keeping it understated.
Simple Stripes
Stripes are a classic design that never goes out of style. For a minimalist look, opt for thin, vertical stripes in a neutral color. You can use striping tape to ensure your lines are straight and even. This design is perfect for those who want a clean and sophisticated look without too much effort.
Sometimes, less is more. Minimalist nail art allows the beauty of simplicity to shine through, making a quiet yet powerful statement.

Bold and Bright Nail Art Designs
Blue Gradient
A blue gradient is a stunning way to bring some flair to your nails. Start with a light blue at the base and gradually blend into a deep navy at the tips. This design not only looks sophisticated but also offers a smooth transition of shades that can be mesmerizing. You can use a sponge to dab the colors onto your nails for a seamless blend. Finish off with a glossy top coat to make the colors pop even more.
Dandelion Yellow with Black Dots
Want to make a statement? Dandelion yellow nails with black dots are a bold choice. The vibrant yellow serves as a perfect canvas for those striking black dots. To achieve this look, paint your nails in a bright yellow shade and let them dry completely. Then, using a dotting tool, add black dots randomly across the nails. This playful pattern is sure to catch the eye and bring a bit of sunshine to your day.
Red Velvet French
For those who love a classic look with a twist, the red velvet French manicure is perfect. This design combines the elegance of a French tip with the richness of a deep red hue. Paint your nails with a base coat of nude or pale pink. Once dry, use a deep red polish to create the French tip. The contrast between the nude base and the red tip is both chic and sophisticated, making it suitable for any occasion.
“Bold and bright nail designs are not just about the colors; they’re about expressing yourself with confidence. Let your nails reflect your vibrant personality.”
Explore a variety of colorful nail ideas, including neon French manicures perfect for short nails and vibrant retro pop-art-inspired designs, catering to diverse styles and preferences.
3D and Textured Nail Art Designs

Bling Fingers
Want your nails to shine like diamonds? Bling fingers are the way to go. This style is all about adding a touch of glamour with rhinestones, crystals, or even tiny pearls. Here’s how to achieve this look:
- Start with a clean, dry nail and apply a base coat to protect.
- Paint your nails with a color of your choice. Neutral tones often work best to let the bling stand out.
- While the polish is still tacky, use tweezers to place your chosen embellishments onto the nail.
- Secure the design with a top coat to ensure everything stays in place.
The key to this look is balance. Too much bling can be overwhelming, so focus on one or two accent nails.
3D Nail Art
3D nail art is where creativity really takes off. Using elements like acrylic shapes, 3D nail designs can elevate traditional nail art with unique three-dimensional shapes. Here’s a step-by-step guide:
- Choose your base color and apply it evenly.
- While the polish is still wet, arrange your 3D elements with precision.
- For more intricate designs, use a small brush and 3D gels or acrylics to sculpt directly on the nail.
- Cure the design under a UV or LED lamp to harden the elements.
- Finish with a strong top coat to protect your art.
Remember, patience is your best friend here. Take your time to ensure each piece is placed perfectly.
Embellished French Tips
French tips are classic, but why not add a twist? Embellished French tips combine the elegance of a French manicure with the fun of 3D art.
- Start by applying a nude or pale pink base.
- Once dry, use a white polish to paint the tips.
- Before the white polish dries, add small embellishments like studs or mini gems along the tip line.
- Seal with a top coat to keep everything in place.
This design is perfect for those who love a subtle yet sophisticated look, and it’s a great conversation starter!
Advanced Nail Art Techniques

Water Marble
Water marbling is a fascinating way to create unique nail designs that are sure to catch the eye. To start, fill a small cup with room-temperature water. Drop in your chosen nail polish colors one by one, allowing each to spread over the water’s surface. Using a toothpick, draw patterns in the polish. Once satisfied with the design, dip your nail in at an angle, and use the toothpick to clear away excess polish before removing your nail. It’s a bit messy, so taping around your nail can help keep your fingers clean. Patience is key here; not every attempt will be perfect, but with practice, you’ll achieve beautiful results.
Ombre Nails
Ombre nails are all about blending colors seamlessly. Start with a base color and let it dry completely. Next, take a sponge—either a makeup sponge or a nail-specific one—and paint your chosen colors in stripes on it. Dab the sponge lightly onto the nail, moving from tip to base. Repeated dabbing blends the colors together, creating a smooth gradient. Applying multiple thin layers can help achieve a more polished look. Finish with a top coat to add shine and further blend the colors.
3D Nail Art
Taking nail art to the next level, 3D designs use elements like gems, acrylic shapes, or sculpted gel to create textured looks. Start with a base color, and while it’s still tacky, place 3D elements using tweezers. For sculpted designs, use a small brush with 3D gels or acrylics to build shapes directly on the nail. A UV or LED lamp is needed to cure these designs. To ensure they last, advise avoiding snagging on clothing or objects, and always apply a strong top coat to secure the design.
Encapsulated Nail Art
Encapsulated nail art involves embedding tiny decorations within layers of acrylic or gel, creating a deep, luxurious look. Think 3D flowers, glitter, or even seashell shards suspended between layers. This technique requires precision and patience. Start with a high-quality clear acrylic powder. After creating a base layer, place your decorations as desired. Carefully apply another thin layer over them to encapsulate safely, then cure or let dry. Practice is key to avoid air bubbles or uneven surfaces.
Advanced nail art techniques allow you to transform your nails into a canvas for creativity. While they require a steady hand and a bit of patience, the results can be stunningly unique and personal. Dive in and let your imagination run wild.
Conclusion
So there you have it, a bunch of cool nail art ideas to try out. Whether you’re into bold colors or something more subtle, there’s definitely a design for you. Nail art is all about expressing yourself, so don’t be afraid to mix and match styles or come up with your own twist. Remember, it’s not just about looking good, but having fun with it too. So grab your favorite polish and get creative. Your nails are your canvas, after all. Happy painting!
Frequently Asked Questions
What are some easy nail art designs for beginners?
Beginners can start with simple designs like polka dots, stripes, or using nail stickers. These are easy to create and don’t require advanced skills.
How can I make my nail polish last longer?
To extend the life of your manicure, apply a clear top coat every few days, avoid using your nails as tools, and wear gloves when doing chores.
What tools do I need for nail art at home?
Basic tools include nail polish, a dotting tool, striping tape, and a small brush. You can also use household items like toothpicks for creating designs.
How do I remove gel nail polish safely?
Soak a cotton ball in acetone, place it on your nail, and wrap it with foil. After 10-15 minutes, gently push off the gel with a cuticle pusher.
Can I do nail art on short nails?
Yes, nail art can be done on any nail length. Simple designs like dots, stripes, or a small accent nail can look great on short nails.
How can I fix a smudged nail polish quickly?
If you smudge your nail polish, dip a clean brush in nail polish remover and gently smooth out the smudge. Reapply a small amount of polish if needed.


Seja o primeiro a comentar!